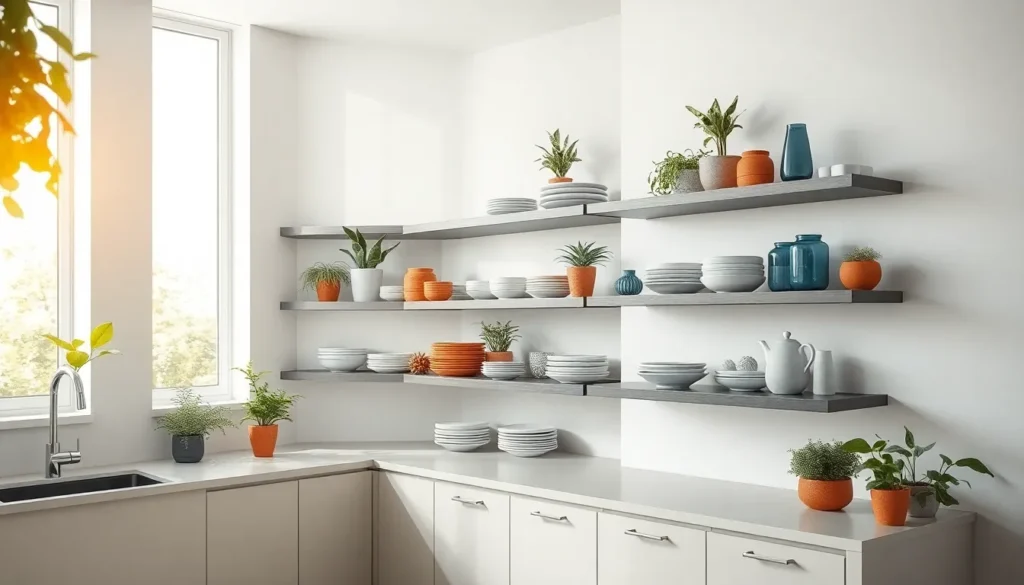
Floating shelves are revolutionizing modern kitchen design and we’re here to show you why they’re the perfect storage solution for any home. These sleek wall-mounted wonders create the illusion of weightlessness while maximizing your kitchen’s vertical space and adding a touch of contemporary elegance.
We’ve discovered that floating shelves aren’t just practical—they’re incredibly versatile design elements that can transform your kitchen’s entire aesthetic. Whether you’re working with a compact galley kitchen or a spacious open-concept layout these shelves adapt to any style from rustic farmhouse to minimalist modern.
The best part? Installing floating shelves is surprisingly straightforward and they’re budget-friendly compared to traditional cabinetry. We’ll explore creative placement ideas stylish materials and clever organization tips that’ll make your kitchen both functional and Instagram-worthy. Get ready to discover how these simple additions can completely reimagine your cooking space.
Open Shelving Above Kitchen Islands for Modern Appeal
Kitchen islands serve as natural focal points, making them perfect locations for floating shelf installations that enhance visual impact.
Creating Visual Balance with Symmetrical Placement
Symmetrical floating shelves create a polished look that draws the eye naturally toward your kitchen island centerpiece. We recommend installing matching shelves at equal distances from the island’s center point to achieve perfect balance. Position shelves 18 to 24 inches above the island surface to maintain proper clearance while maximizing visual impact.
Installing three shelves works best for larger islands measuring 8 feet or longer, while two shelves suit standard 6-foot islands perfectly. We suggest using identical shelf lengths that span roughly two-thirds of your island’s width for optimal proportion. The consistent spacing between shelves should measure 12 to 15 inches vertically to create clean lines that complement modern kitchen aesthetics.
Consider the overall kitchen layout when planning your symmetrical arrangement to ensure the shelves don’t compete with existing elements like pendant lights or range hoods. Floating shelves positioned symmetrically above islands create a restaurant quality appearance that elevates the entire kitchen’s sophistication level.
Choosing the Right Wood Tone to Match Your Island
Wood tone coordination between floating shelves and kitchen islands creates a cohesive design that feels intentionally planned rather than randomly assembled. We recommend selecting shelf materials that either perfectly match your island’s finish or provide complementary contrast for visual interest.
Light oak floating shelves pair beautifully with white or cream colored islands, creating a Scandinavian inspired aesthetic that feels fresh and airy. Walnut shelves complement darker island finishes like navy blue or charcoal gray, adding warmth while maintaining the modern appeal you’re seeking.
Consider your existing kitchen elements when selecting wood tones to ensure the floating shelves integrate seamlessly with your overall design scheme. Natural wood grains in shelving materials should coordinate with your island’s cabinet hardware, flooring, and other wooden elements throughout the space.
We suggest bringing wood samples home to test how different tones look under your kitchen’s exact lighting conditions before making final selections. The right wood tone choice transforms floating shelves from simple storage answers into sophisticated design elements that enhance your island’s architectural presence.
Corner Floating Shelves to Maximize Dead Space
 1")
Corner spaces in kitchens often become forgotten zones that collect dust rather than serving practical purposes. We can transform these underutilized areas into functional storage and display spaces with strategically placed floating shelves.
Installing L-Shaped Corner Configurations
L-shaped corner floating shelves offer the perfect solution for fitting snugly into kitchen angles where traditional shelving won’t work. We recommend measuring your corner space carefully before ordering custom-cut shelves that maximize every available inch. Installation requires secure wall anchors or heavy-duty brackets to ensure proper weight support, especially when displaying heavier items like ceramic dishes or small appliances.
Stacked configurations work exceptionally well in compact kitchens where vertical storage becomes essential for organization. We suggest spacing multiple shelves 12 to 15 inches apart to accommodate various item heights while maintaining easy access. Single shelf installations provide a minimalist approach that’s perfect for displaying a few statement pieces without overwhelming the corner space.
Displaying Dishes and Glassware Effectively
Arranging items by height creates visual flow that draws the eye naturally across your corner display. We find that grouping similar pieces together, such as matching dinner plates or coordinating glassware sets, establishes a cohesive look that feels intentional rather than cluttered. Color coordination adds another layer of visual appeal, whether you choose monochromatic schemes or complementary color palettes.
Frequently used items should occupy the most accessible shelf positions to maintain both form and function in your kitchen workflow. We recommend placing everyday glasses and plates on middle shelves while reserving top shelves for decorative pieces or items used less frequently. Natural light enhancement occurs when open shelving allows illumination to highlight your displayed pieces, creating a brighter and more inviting kitchen atmosphere that showcases your favorite kitchenware.
Industrial Pipe and Wood Floating Shelves for Rustic Charm
 2")
Industrial pipe and wood floating shelves bring together the best of both worlds, creating rustic charm while maintaining modern functionality in your kitchen design. These shelves offer a perfect solution for homeowners seeking farmhouse or urban loft aesthetics.
Selecting the Perfect Pipe Finish
Brushed nickel creates a subtle sheen that beautifully complements stainless steel appliances throughout your kitchen space. We recommend this finish when you want sophistication without overwhelming the overall design scheme.
Black matte finishes provide bold contrast and amplify the industrial vibe that makes these shelves so appealing. Consider this option when your kitchen features darker cabinetry or when you’re aiming for a dramatic focal point.
Copper and bronze finishes add warmth while introducing vintage character to your floating shelf installation. These warmer tones work exceptionally well in kitchens with traditional or transitional design elements.
Matching your pipe finish with existing metal elements like faucets, cabinet hardware, and lighting fixtures creates design cohesion throughout the space. Alternatively, we suggest using contrasting finishes strategically to add visual interest without creating chaos.
Combining Reclaimed Wood with Metal Elements
Reclaimed wood introduces authentic texture and natural warmth that softens the industrial edge of metal pipe supports. This combination creates visual balance between organic and structured elements in your kitchen design.
Metal pipes provide the structural durability needed to support everyday kitchen items while maintaining the clean lines that floating shelves are known for. We’ve found that this pairing enhances both visibility and accessibility for frequently used items.
Customization options allow you to adjust shelf length and depth to fit exact wall spaces, making these shelves perfect for areas between upper cabinets or awkward corners. Stacking multiple shelves vertically maximizes storage potential in smaller kitchens.
Style flexibility means these shelves work equally well in modern and rustic kitchen themes, adapting to your changing décor needs over time. You can easily refresh the look by simply rearranging the items you display on them.
Floating Shelves as Coffee and Tea Stations
 3")
Building on our exploration of floating shelf placement and materials, we’ll now focus on one of the most popular applications: creating dedicated coffee and tea stations. These functional zones transform ordinary kitchen walls into stylish beverage preparation areas.
Creating a Dedicated Beverage Zone
Open design concepts flourish when we replace traditional cabinetry with floating shelves above our beverage stations. This approach proves particularly effective in small kitchens or spaces lacking natural light, where bulky cabinets can make areas feel cramped and dark.
Vertical stacking maximizes our storage potential by installing multiple shelves of identical length. We can accommodate coffee makers on lower shelves while reserving upper levels for tea infusers, filters, and specialty brewing equipment.
Strategic positioning requires placing shelves at heights that ensure easy access to our daily essentials. Most coffee stations benefit from primary shelves positioned 15-18 inches above countertops, with additional shelves spaced 12-14 inches apart for optimal functionality.
Material coordination enhances our kitchen’s overall aesthetic when we select shelf materials that complement existing cabinetry and countertops. Wooden shelves add warmth and coziness to modern kitchens, while metal brackets can reinforce industrial or contemporary themes.
Organizing Mugs and Accessories Stylishly
Display versatility allows us to showcase our favorite mugs, cups, and brewing accessories in visually appealing arrangements. We can create seasonal displays or thematic collections that reflect our personal style while maintaining easy access to daily essentials.
Aesthetic layering works best when we position decorative items like vintage tea sets or designer coffee mugs alongside functional pieces. This approach transforms our beverage station into an attractive focal point that guests naturally admire.
Height optimization ensures we place frequently used items on easily accessible shelves while reserving top levels for decorative pieces or special occasion items. Daily coffee mugs should occupy the most convenient shelf, typically at eye level or slightly below.
Color coordination creates visual harmony when we group similar colored mugs together or arrange items in pleasing color gradients. This technique makes our coffee station appear intentionally designed rather than randomly assembled.
Under-Cabinet Floating Shelves for Extra Storage
 4")
Under-cabinet floating shelves transform wasted space into valuable storage answers while maintaining your kitchen’s streamlined appearance. These strategic installations keep frequently used items within arm’s reach without cluttering countertops.
Maximizing Vertical Space Between Counters and Cabinets
Stacking multiple floating shelves creates impressive storage capacity in the space between your counters and upper cabinets. We recommend installing shelves at 12-16 inch intervals to accommodate dishes, cookware, and decorative items comfortably.
Customizing shelf depth ensures maximum functionality without interfering with daily tasks. Standard depths of 8-10 inches work perfectly for most kitchen essentials, while 6-inch shelves suit spice collections and smaller items.
Arranging items by frequency optimizes your workflow efficiency. Place everyday dishes on middle shelves, store serving pieces on upper levels, and keep cooking utensils on lower shelves for easy access during meal preparation.
Coordinating materials with existing cabinetry creates visual cohesion throughout your kitchen. Match wood tones to your cabinet finish or choose complementary materials that enhance your overall design aesthetic.
Installing LED Strip Lighting for Ambient Glow
Positioning LED strips under floating shelves creates beautiful accent lighting that highlights your displayed items. We suggest installing strips along the front edge of each shelf for even light distribution without harsh shadows.
Selecting warm white LEDs (2700K-3000K) provides inviting ambient lighting that complements most kitchen color schemes. This temperature range creates a cozy atmosphere while ensuring adequate visibility for accessing stored items.
Installing dimmer controls allows you to adjust lighting intensity based on time of day or mood. Morning coffee preparation benefits from bright illumination, while evening entertaining calls for softer, more atmospheric lighting.
Concealing wiring maintains the clean aesthetic of floating shelves. Run electrical cables through wall channels or behind adjacent cabinetry to keep the installation looking professional and uncluttered.
Connecting to smart home systems enables voice control and automated scheduling of your shelf lighting. Integration with existing home automation creates seamless control over your kitchen’s ambient lighting throughout the day.
Floating Spice Racks and Herb Gardens
 5")
Transforming empty wall space into functional spice storage creates an organized cooking environment while adding visual appeal to your kitchen. Custom spice organization systems and living herb displays on floating shelves maximize both efficiency and aesthetics.
Building Custom Spice Organization Systems
Custom designs allow us to create spice storage that perfectly fits our cooking habits and available space. Installing narrow floating shelves with integrated rails prevents spice jars from sliding while keeping labels clearly visible for quick identification.
Tiered arrangements work exceptionally well for spice collections, with each shelf positioned 8-10 inches apart to accommodate standard spice containers. We can incorporate small pull-out drawers or wire baskets underneath each shelf to store loose spice packets and overflow items.
Vertical configurations make excellent use of narrow wall spaces between appliances or in kitchen corners. Mounting three to four shallow shelves creates dedicated zones for different spice categories like baking essentials, international seasonings, and everyday cooking spices.
Magnetic spice systems integrate seamlessly with floating shelves when we install thin metal strips along the front edge. This approach keeps frequently used spices within arm’s reach while maintaining the clean lines of floating shelf design.
Incorporating Live Herbs on Kitchen Shelves
Strategic placement near windows or under-cabinet lighting ensures herbs receive adequate light for healthy growth. We position herb planters on floating shelves 18-24 inches above countertops for easy watering and harvesting without interference with food preparation.
Water-friendly materials become essential when incorporating live plants into floating shelf displays. Installing small drip trays or selecting shelves with sealed wood finishes protects both the shelving and surrounding walls from moisture damage.
Companion planting creates attractive herb combinations while maximizing growing space on each shelf. Pairing basil with oregano or grouping mint varieties together provides visual cohesion while offering diverse flavors for cooking.
Seasonal rotation keeps herb displays fresh and functional throughout the year. We can easily swap out summer herbs like basil for winter-hardy options like rosemary, maintaining year-round access to fresh seasonings while adapting to changing growing conditions.
Gallery Wall Style Floating Shelves for Display
 6")
Creating a gallery wall style display with floating shelves transforms ordinary kitchen walls into curated showcases that blend functionality with artistic flair. This approach elevates kitchen design by turning storage into an intentional display element.
Arranging Multiple Shelves at Varying Heights
Staggering shelves at different elevations creates visual rhythm and maximizes your wall’s potential. We recommend spacing shelves 18-24 inches apart vertically to allow adequate display room for taller items like wine bottles or decorative vases. Alternating shelf lengths adds depth and prevents the monotonous appearance of uniform installations.
Installing three to five shelves works best for most kitchen walls, with the middle shelf positioned at eye level for easy access to frequently used items. Shorter shelves can hold smaller decorative pieces like succulents or spice jars, while longer shelves accommodate cookbooks and larger serving dishes. This varied arrangement provides ample storage while maintaining the open feel that’s essential for small kitchens or areas lacking natural light.
Balancing the heights creates a ever-changing focal point that draws the eye upward and makes ceilings appear taller. Testing different configurations with cardboard templates before installation helps you visualize the final result and ensures optimal spacing.
Showcasing Decorative Items and Cookbooks
Displaying personal collections transforms functional storage into meaningful conversation starters. We suggest grouping items by color, height, or theme to create cohesive vignettes that reflect your personality and cooking style. Vintage kitchenware like copper pots or ceramic bowls adds warmth and character when mixed with modern accessories.
Cookbooks serve as both functional references and decorative elements when arranged spine-out with covers facing forward on alternating books. Positioning recipe collections at comfortable reading height makes them easily accessible during meal preparation. Seasonal items like holiday serving pieces or summer entertaining accessories can rotate throughout the year to keep displays fresh and relevant.
Incorporating plants or small herb pots between decorative objects softens the overall look while adding natural elements to your kitchen design. Leaving some negative space prevents overcrowding and maintains the clean, curated aesthetic that makes gallery wall displays so visually appealing.
Floating Shelves Around Kitchen Windows
 7")
Window areas offer prime real estate for combining storage with natural beauty in our kitchens. We can transform these spaces into both functional storage answers and stunning design focal points that enhance the room’s overall appeal.
Framing Natural Light with Functional Storage
Positioning floating shelves strategically around kitchen windows creates an elegant frame that enhances natural light while providing essential storage space. We recommend installing shelves at varying heights on either side of windows to maintain an unobstructed view while maximizing vertical storage potential.
Materials play a crucial role in achieving the perfect balance between function and aesthetics. Wood shelves bring warmth and texture that complements natural light beautifully, while glass options maintain transparency and allow light to flow freely throughout the space. Metal brackets in brushed nickel or matte black finishes add contemporary sophistication without overwhelming the window’s natural beauty.
Stacking multiple shelves creates dimensional depth that draws the eye upward and makes ceilings appear higher. We suggest spacing shelves 12 to 18 inches apart to accommodate various items from coffee mugs to decorative bowls. This configuration transforms ordinary window areas into striking architectural features that serve both practical and visual purposes.
Display opportunities abound when we frame windows with floating shelves. Morning light filters through glassware and ceramic pieces, creating beautiful reflections that change throughout the day. We can rotate seasonal items like small potted plants in spring or festive decorations during holidays to keep the display fresh and captivating.
Growing Kitchen Herbs on Window Shelves
Kitchen herb gardens thrive on floating shelves positioned near windows where they receive optimal sunlight for healthy growth. We’ve found that herbs like basil, rosemary, and thyme flourish in this setup while remaining easily accessible for daily cooking needs.
Selecting appropriate planters ensures both plant health and shelf protection. Small ceramic pots with drainage saucers work excellently for individual herbs, while rectangular planter boxes maximize space efficiency for multiple varieties. We recommend choosing water resistant materials like sealed wood or composite materials for the shelves themselves to prevent moisture damage over time.
Sunlight requirements vary among different herb varieties, making window shelf placement critical for success. Mediterranean herbs such as oregano and sage prefer direct morning light, while parsley and chives tolerate partial shade conditions. We can arrange plants according to their exact light needs, placing sun loving varieties closest to the window and shade tolerant options on outer shelves.
Maintenance becomes simpler when we organize herbs by watering frequency and growth patterns. Compact varieties like thyme work well on narrow shelves, while bushier herbs like mint require deeper shelving for proper root development. Regular harvesting encourages continued growth and ensures fresh ingredients remain within arm’s reach during meal preparation.
Trellis systems or small support structures can extend growing possibilities for climbing herbs like certain varieties of oregano or trailing rosemary. These additions create vertical growing space while adding textural interest to the window display. We can incorporate these elements seamlessly into our floating shelf design for both practical and aesthetic benefits.
Minimalist White Floating Shelves for Clean Lines
 8")
White floating shelves create the ultimate clean, modern aesthetic that transforms any kitchen into a sophisticated space. We’ve found these shelves excel at visually opening up even the smallest kitchens while maintaining that coveted minimalist style.
Achieving Seamless Integration with White Kitchens
White floating shelves blend effortlessly into all-white kitchens, creating unmatched continuity and visual sophistication. Positioning these shelves to align with your range hood or existing cabinets forms a cohesive unit that blurs the line between storage and décor.
Materials like painted wood, laminate, or metal construction ensure both durability and easy maintenance while preserving that smooth, unadorned appearance. Strategic placement creates subtle visual separation between different kitchen surfaces such as marble backsplashes and painted walls without disrupting the overall harmony.
Aligning shelf edges with cabinet fronts maximizes the seamless integration effect, making your storage appear built-in rather than added as an afterthought. We recommend measuring carefully to ensure perfect alignment that enhances your kitchen’s architectural flow.
Maintaining Clutter-Free Aesthetic Appeal
Curating items displayed on white floating shelves preserves that essential clutter-free look while maintaining functionality. Selecting a limited collection of frequently used or decorative kitchenware arranged with clear intention highlights the minimalist design philosophy.
Stacking floating shelves of identical lengths maximizes vertical storage without sacrificing the sleek, streamlined appearance that defines minimalist aesthetics. Arranging items with purposeful spacing between each piece prevents visual crowding and maintains the clean lines that make white shelves so appealing.
We suggest displaying only essential items that serve both practical and aesthetic purposes, such as matching white ceramic containers or sleek glassware. This approach ensures your shelves remain both functional storage answers and striking design elements that enhance your kitchen’s minimalist appeal.
Floating Shelves with Hidden Brackets for Sleek Look
 9")
Hidden bracket systems create the ultimate seamless appearance by making floating shelves appear to magically extend from your kitchen walls. We’ll explore how these invisible support systems can transform your kitchen storage while maintaining that coveted minimalist aesthetic.
Installing Invisible Support Systems
Choose heavy duty brackets that can support at least 50 pounds per shelf to ensure your floating shelves remain secure over time. Metal brackets with concealed mounting hardware provide the strongest foundation for kitchen storage needs.
Mark your wall studs carefully using a stud finder before drilling any holes for bracket placement. We recommend spacing brackets 16 to 24 inches apart depending on your shelf length and expected load capacity.
Drill pilot holes directly into wall studs using a drill bit that’s slightly smaller than your mounting screws. This prevents wall damage while ensuring a tight, secure fit that won’t loosen over time.
Install the mounting brackets by screwing them flush against the wall surface. Double check that each bracket sits level using a small bubble level before fully tightening the screws.
Position your shelf carefully onto the installed brackets, ensuring it slides completely onto the mounting hardware. Test the stability by gently pressing down on different areas of the shelf before loading it with items.
Choosing Materials That Complement Your Kitchen Style
Wood floating shelves work beautifully in traditional and rustic kitchens where warmth and natural texture enhance the overall design. Oak, maple, and reclaimed barn wood offer distinct grain patterns that can be stained or painted to match your existing cabinetry perfectly.
Metal shelves bring contemporary sophistication to modern and industrial kitchen designs with their clean lines and minimalist appeal. Stainless steel options coordinate seamlessly with appliances, while powder coated finishes in black or white provide bold contrast against colorful backsplashes.
Glass shelves create an elegant, sophisticated appearance that works particularly well in contemporary kitchens with abundant natural light. Tempered glass options ensure safety while maintaining that airy, open feeling that makes smaller kitchens appear more spacious.
Consider your kitchen’s existing color palette when selecting shelf materials to ensure visual harmony throughout the space. Natural wood tones complement warm color schemes, while sleek metal and glass options enhance cool, monochromatic designs.
Conclusion
Floating shelves offer endless possibilities for transforming your kitchen into a more functional and stylish space. Whether you’re working with a compact galley kitchen or a spacious open-concept design these versatile storage answers adapt to your unique needs and aesthetic preferences.
The key to success lies in thoughtful planning and strategic placement. We’ve seen how the right combination of materials lighting and organization can turn simple wall-mounted shelves into stunning focal points that enhance your kitchen’s overall appeal.
Remember that floating shelves aren’t just about storage – they’re design elements that reflect your personal style while solving practical challenges. With proper installation and creative arrangement you’ll create a kitchen that’s both beautiful and brilliantly organized.
Frequently Asked Questions
What are the main benefits of floating shelves in kitchens?
Floating shelves maximize vertical space while adding a contemporary touch to kitchen design. They’re versatile enough to suit various styles from rustic to minimalist, easy to install, and more budget-friendly than traditional cabinetry. They also create an open, airy feel while providing functional storage for dishes, spices, and decorative items.
How should I position floating shelves above my kitchen island?
Position floating shelves symmetrically above your kitchen island to create visual balance. Space shelves 12-16 inches apart vertically, and ensure shelf lengths complement the island’s proportions. Consider the island as a natural focal point and use shelves to enhance this feature while maintaining proper clearance for functionality.
What materials work best for floating shelves in kitchens?
Wood offers traditional warmth and can be stained to match existing cabinetry. Metal provides a contemporary, industrial look that’s durable and easy to clean. Glass creates an elegant, light appearance that works well in modern kitchens. Choose materials that complement your kitchen’s existing color palette and design style.
How do I create an effective corner floating shelf configuration?
Use L-shaped corner configurations for a snug fit and secure installation. Ensure proper weight support for heavier items by anchoring into wall studs. For compact kitchens, consider stacked configurations with 12-16 inch spacing between shelves to maintain accessibility while maximizing storage in underutilized corner spaces.
What’s the best way to organize items on floating shelves?
Arrange items by height with taller pieces in back and shorter ones in front. Use color coordination to create visual appeal. Place frequently used items on easily accessible middle shelves, reserve top shelves for decorative pieces, and organize by category (dishes together, spices together) for better functionality.
How can I install floating shelves with hidden brackets?
Use heavy-duty hidden bracket systems that anchor into wall studs for maximum stability. Mark stud locations accurately, drill pilot holes, and ensure brackets are perfectly level. Hidden brackets create a seamless, minimalist appearance by making shelves appear to “float” without visible support hardware.
Can floating shelves work as coffee and tea stations?
Yes, floating shelves create excellent beverage stations. Stack shelves vertically with lower shelves for coffee makers and upper shelves for mugs and accessories. Maintain 16-18 inch spacing between shelves for easy access to appliances, and coordinate materials with your kitchen’s overall aesthetic for a cohesive look.
How do I incorporate lighting with floating shelves?
Install LED strip lighting underneath shelves to create ambient glow and highlight displayed items. Use warm white LEDs for a cozy atmosphere and add dimmer controls for adjustable lighting. Conceal wiring for a clean appearance and consider smart home integration for voice control and automation features.
What spacing should I use for gallery-style floating shelf arrangements?
Stagger shelves at varying heights with 8-12 inches between shorter shelves and 16-20 inches for taller displays. This creates visual rhythm while maximizing wall potential. Maintain an open feel by avoiding overcrowding and ensure each shelf has breathing room to showcase items effectively.
How do I choose the right wood tone for floating shelves?
Test wood samples in your kitchen’s actual lighting conditions to find the perfect match. Consider whether you want shelves to match existing cabinetry exactly or provide complementary contrast. Natural lighting changes throughout the day, so observe samples at different times to ensure the tone works consistently with your kitchen’s aesthetic.