Bathroom molding can completely transform your space from basic to breathtaking with just a few strategic design choices. We’ve discovered that the right molding doesn’t just add visual interest – it actually makes your bathroom feel larger more luxurious and professionally designed.
Whether you’re working with a powder room or a master suite we’ll show you how crown molding baseboards and decorative trim can elevate every corner of your space. From classic subway tile borders to modern geometric patterns these molding ideas work with any budget and skill level.
The best part? Most of these bathroom molding projects can be completed in a weekend giving you maximum impact with minimal time investment. Let’s explore the molding options that’ll turn your ordinary bathroom into a stunning retreat you’ll actually want to spend time in.
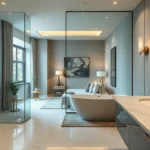
Crown Molding for Elegant Bathroom Ceilings
Crown molding transforms ordinary bathroom ceilings into sophisticated architectural features that draw the eye upward and create visual height. We’ve seen how this classic detail can make even compact bathrooms feel more spacious and luxurious.
Traditional Crown Molding Styles
Ornate Victorian profiles feature intricate curves and multiple layers that work beautifully in bathrooms with vintage fixtures and clawfoot tubs. Elaborate dentil molding adds texture through repeating rectangular blocks that create shadows and depth along the ceiling line. Georgian style crown molding incorporates classic proportions with clean lines and subtle curves that complement both traditional and transitional bathroom designs.
Colonial inspired profiles offer simpler curves with elegant proportions that pair perfectly with wainscoting and panel molding throughout the space. Rope molding details can accent these traditional styles by adding twisted texture that catches light and creates visual interest. Coffered ceiling treatments combined with crown molding create dramatic grid patterns that work especially well in master bathrooms with higher ceilings.
Modern Minimalist Crown Options
Flat panel crown molding provides clean geometric lines that complement contemporary bathroom designs without overwhelming the space. Simple L shaped profiles create subtle transitions between walls and ceilings while maintaining the sleek aesthetic modern bathrooms require. Floating crown molding appears to hover between the wall and ceiling through hidden mounting systems that eliminate visible brackets or nails.
LED integrated crown molding combines lighting functionality with architectural detail by housing LED strips that provide ambient ceiling illumination. Geometric profiles with sharp angles and straight edges work perfectly with modern bathroom fixtures like vessel sinks and wall mounted faucets. Asymmetrical crown designs break traditional symmetry rules through varying depths and angles that create ever-changing visual movement along the ceiling perimeter.
Moisture Resistant Materials for Crown Molding
PVC crown molding resists moisture damage and warping while maintaining crisp detail that looks identical to traditional wood profiles. Polyurethane molding offers lightweight installation with superior moisture resistance that won’t crack or split in high humidity environments. Medium density fiberboard with moisture resistant coating provides affordable options that handle bathroom conditions when properly sealed and painted.
Cellular PVC materials expand and contract minimally with temperature changes while remaining completely waterproof for long term bathroom installations. Composite wood alternatives combine natural wood fibers with synthetic resins that resist moisture while accepting paint and stain finishes beautifully. Aluminum crown molding never warps or deteriorates from moisture exposure and works especially well in modern bathroom designs where metal accents complement fixtures and hardware.
Wainscoting Ideas for Bathroom Walls
 1")
Wainscoting transforms bathroom walls by adding texture and depth while providing protection against moisture damage. We’ve identified the most effective styles that enhance both function and aesthetic appeal in bathroom spaces.
Beadboard Wainscoting for Classic Appeal
Beadboard style features vertical strips of wood with rounded or beaded edges that create timeless visual interest on bathroom walls. We recommend this approach for traditional or coastal themed bathrooms where the linear pattern adds subtle texture without overwhelming smaller spaces. Installing beadboard wainscoting typically covers the lower third of wall height and pairs beautifully with painted upper walls in complementary colors.
Quality beadboard materials include moisture resistant MDF, PVC, or genuine wood panels that withstand bathroom humidity levels. Maintenance becomes simple since smooth vertical surfaces clean easily and hide minor scuffs or water spots that occur in high traffic areas.
Raised Panel Wainscoting for Formal Look
Raised panel style involves recessed panels framed by decorative molding that creates elegant architectural detail on bathroom walls. We suggest this sophisticated option for larger bathrooms where formal design elements enhance the luxurious atmosphere. Each panel sits within a frame of chair rail and baseboard molding that adds dimensional depth to flat wall surfaces.
Installation requires precise measurement and cutting to ensure panels fit properly between existing fixtures and doorways. Premium materials like solid wood or high quality composite panels justify the investment through improved durability and refined appearance that increases home value.
Board and Batten Style Wainscoting
Board and batten style uses wide boards with narrower strips covering the joints between them for rustic charm in bathroom designs. We favor this versatile approach because it adapts to various decorating styles from modern farmhouse to contemporary spaces. Vertical boards create visual height while horizontal installation can make narrow bathrooms appear wider.
Taupe vertical shiplap exemplifies modern farmhouse applications where half wall installations provide wainscoting effects without full wall coverage. Budget friendly materials like pine or poplar work well when properly sealed against moisture while maintaining the authentic wood grain appearance that defines this classic American style.
Baseboard Molding Solutions for Bathroom Floors
 2")
Baseboards form the essential foundation where your bathroom walls meet the floor, requiring specialized materials and techniques to withstand constant moisture exposure. We’ll explore waterproof answers that protect your investment while maintaining visual appeal.
Waterproof Baseboard Materials
PVC baseboards deliver exceptional performance in high-moisture environments, resisting water damage while preventing rot and mildew growth. Lightweight construction makes installation straightforward, yet these materials maintain durability for years of reliable service.
Colonial PVC moulding comes prepainted in white finishes, offering waterproof protection without sacrificing classic styling. Installation requires minimal preparation since these units arrive ready to mount directly onto your walls.
Polymer baseboard materials feature impact resistance alongside water protection, often incorporating chambers that conceal electrical cables or plumbing lines. These innovative designs solve multiple bathroom challenges while maintaining clean visual lines.
Waterproof white baseboard moldings resist mold, water, humidity, and pest infiltration, making them perfect for bathrooms and kitchens where moisture control is critical. These specialized materials eliminate common maintenance headaches associated with traditional wood baseboards.
Decorative Baseboard Profiles
Colonial style baseboards provide timeless appeal through clean lines and classic proportions that complement traditional bathroom designs. These profiles work particularly well with subway tile and vintage fixtures.
Modern baseboard designs feature sleek, minimalist profiles that enhance contemporary bathroom décors without overwhelming the space. Contemporary options integrate seamlessly with floating vanities and frameless shower enclosures.
Raised profile baseboards add dimensional interest while maintaining practical functionality, creating subtle shadows that enhance wall textures. These designs bridge the gap between decorative and functional requirements.
Caulking and Sealing Techniques
Silicone caulk creates effective moisture barriers around baseboard edges, preventing water infiltration that leads to structural damage. Apply smooth, continuous beads along all joints where baseboards meet floors and walls.
Polyurethane caulk provides flexible sealing that accommodates natural expansion and contraction cycles in bathroom environments. This material maintains integrity even though temperature fluctuations and humidity changes.
Mold resistant caulks incorporate antimicrobial additives that actively prevent mold growth in perpetually moist conditions. These specialized formulations extend the life of your seal while maintaining a clean appearance around your bathroom baseboards.
Chair Rail Molding for Mid-Wall Design
 3")
Chair rail molding transforms bathroom walls by creating visual division and protecting high-humidity areas from moisture damage. We’ve found this architectural element adds sophisticated interest while breaking up large wall expanses that can feel overwhelming in bathroom spaces.
Positioning Chair Rails at Optimal Height
Standard installation height ranges from 30 to 36 inches from the floor for optimal visual balance and practical protection. We recommend measuring from your finished floor to ensure consistent placement throughout the space. Higher ceilings accommodate chair rails positioned at 36 inches, while standard 8-foot ceilings look best with rails at 32 to 34 inches.
Water splash protection becomes most effective when rails sit within this standard range since most bathroom activities occur below the 36-inch mark. We adjust these measurements based on exact room proportions and user needs, but these dimensions provide the foundation for successful chair rail installation in bathrooms.
Combining Chair Rails with Wallpaper
Wallpaper pairs beautifully with chair rail molding to create sophisticated layered designs that resist moisture damage. We position the rail as a natural transition point between different wall treatments, typically using wallpaper above the rail and paint or tile below.
Moisture control improves significantly when wallpaper coverage stays above the chair rail since this area experiences less direct water exposure. We select vinyl or moisture-resistant wallpapers specifically designed for bathroom environments to ensure longevity and easy maintenance.
Pattern mixing becomes manageable with chair rail boundaries, allowing bold wallpaper designs above neutral painted surfaces below. We often recommend subtle textures or small-scale patterns that won’t overwhelm compact bathroom spaces while still adding visual interest.
Painted Two-Tone Wall Treatments
Two-tone paint schemes with chair rail molding create striking visual contrast that enhances spatial perception in bathrooms. We typically apply darker or bolder colors below the rail with lighter neutral tones above to ground the space and create height illusion.
Color placement affects room proportions dramatically, with darker lower sections making walls appear taller and more substantial. We choose water-resistant paint formulations specifically designed for high-humidity environments to prevent peeling and maintain color integrity over time.
Classic combinations include navy blue below with crisp white above, or soft gray lower sections paired with cream upper walls. We ensure proper surface preparation and use quality bathroom-exact primers to achieve professional results that withstand daily moisture exposure.
Window and Door Trim Molding Options
 4")
Building on the molding elements we’ve discussed, window and door trim offers another layer of sophistication that can dramatically enhance your bathroom’s architectural character. These trim pieces frame openings while providing essential moisture protection in high-humidity environments.
Casing Styles for Bathroom Windows
Colonial casing styles provide timeless appeal with their simple, rectangular profiles that complement traditional bathroom designs. We recommend these classic options for homeowners seeking clean lines without overwhelming decorative elements.
Craftsman window casings feature wider, flat profiles that create bold statements around bathroom windows. These styles work exceptionally well in larger bathrooms where substantial trim won’t appear disproportionate to the space.
Victorian casing patterns offer ornate, decorative profiles with intricate details that suit formal bathroom designs. We suggest using these elaborate styles in spacious bathrooms where the decorative elements can be properly appreciated.
Moisture-resistant PVC casings deliver practical benefits in areas near showers and sinks where water exposure is frequent. These materials maintain their appearance over time while providing the same visual impact as traditional wood options.
Door Frame Enhancement Ideas
Wider decorative molding transforms standard door frames into architectural focal points that draw attention throughout the bathroom. We recommend increasing trim width by 1-2 inches beyond standard measurements for maximum visual impact.
Layered trim applications create depth and dimension by combining multiple molding profiles on a single door frame. This technique works particularly well in traditional bathrooms where ornate details enhance the overall design theme.
Contrasting color schemes between door frames and walls create striking visual interest that defines spaces within the bathroom. We suggest using darker trim colors against lighter walls or vice versa for optimal contrast.
Flat craftsman-style casings offer modern appeal with their clean, geometric lines that complement contemporary bathroom designs. These profiles work especially well in minimalist spaces where simplicity is the primary design goal.
Coordinating Trim Throughout the Space
Consistent width measurements across all trim elements create visual harmony that unifies the entire bathroom design. We recommend maintaining the same trim width for baseboards, window casings, and door frames throughout the space.
Matching profile styles between different trim elements ensure cohesive design flow from floor to ceiling. This coordination principle applies to crown molding, chair rails, and casing profiles working together seamlessly.
Unified finish applications across all molding elements create professional-looking results that enhance the bathroom’s overall aesthetic. We suggest using the same paint color or stain finish on all trim pieces for maximum visual impact.
Integrated wainscoting coordination combines baseboard trim with wall paneling systems to create comprehensive design schemes. This approach connects floor-level trim with mid-wall elements for complete visual integration throughout the bathroom space.
Decorative Molding Accents for Bathroom Features
 5")
Bathroom molding transforms standard fixtures into architectural focal points that elevate the entire space. Strategic placement of decorative accents creates visual interest while maintaining the cohesive design aesthetic we’ve established with crown molding, wainscoting, and baseboard treatments.
Mirror Frame Molding Treatments
Standard mirrors become custom focal points when we frame them with decorative molding. Window and picture frame moldings adapt perfectly to mirror dimensions, offering various profiles and finishes that coordinate with existing bathroom trim.
Dimensional depth transforms plain mirror surfaces into sophisticated built-in features that appear professionally installed. We can paint or stain these treatments to match our cabinetry and trim work, creating seamless integration throughout the space.
Installation techniques require measuring the mirror perimeter and cutting molding pieces to create a frame that extends slightly beyond each edge. Moisture-resistant adhesives and finishing nails secure the molding while preventing water damage at connection points.
Bathtub Surround Molding Ideas
Polished edges around bathtub surrounds integrate the tub area with our overall bathroom design while providing essential moisture protection. Fluted molding, picture frames, and wainscoting panels enhance the tub perimeter with sophisticated architectural details.
PVC materials resist mold and swelling in areas exposed to constant moisture, making them ideal for bathtub surrounds that require long-term durability. These installations prevent water damage while maintaining their appearance over extended periods.
Design coordination connects tub surrounds to our existing wainscoting and trim treatments, creating visual flow throughout the bathroom. Matching profiles and finishes ensure the bathtub area feels integrated rather than isolated from surrounding elements.
Shower Niche Trim Details
Built-in appearances result from proper trim molding around shower niches, creating finished edges that look professionally installed. Tile edge trims, pencil rails, and small profile moldings provide clean transitions around niche perimeters.
Water-resistant materials including PVC, stainless steel, and treated wood ensure durability in wet shower environments while maintaining aesthetic appeal. These materials protect edges from chipping and water infiltration that could compromise the installation.
Functional benefits combine with visual appeal as trim details prevent moisture damage while creating sophisticated storage answers. Properly finished niches integrate seamlessly with surrounding tile work and maintain their appearance even though constant exposure to water and humidity.
Material Choices for Bathroom Molding Projects
 6")
We’ve explored various molding styles and applications for your bathroom. Now let’s examine the best materials to ensure your molding projects withstand the unique challenges of high moisture environments.
PVC and Composite Molding Benefits
PVC molding stands out as our top recommendation for bathroom installations due to its exceptional moisture resistance properties. These synthetic materials won’t rot, cup, split, twist, or warp even after years of exposure to steam and humidity. Composite materials combine PVC with other plastics to create waterproof answers that resist insect damage while maintaining structural integrity.
We find PVC particularly valuable for areas around bathtubs, showers, and vanities where water exposure is frequent. Installation becomes straightforward since these materials cut cleanly and won’t splinter like traditional wood options. Cost considerations favor PVC for long term value even though higher upfront expenses compared to basic wood alternatives.
Wood Molding Considerations
Wood molding brings natural beauty and traditional appeal to bathroom spaces but requires careful planning for moisture management. We recommend using properly sealed hardwoods like oak or maple rather than softwoods that absorb moisture more readily. Staining options allow you to match existing bathroom fixtures and cabinetry for a cohesive design aesthetic.
Maintenance demands increase significantly with wood materials in high humidity environments. Regular sealing and inspection prevent warping, rotting, and mold growth that can compromise both appearance and structural integrity. Budget planning should account for ongoing maintenance costs alongside the higher initial material expenses compared to synthetic alternatives.
MDF and Primed Options
MDF delivers cost effective answers for bathroom molding projects while offering superior moisture resistance compared to natural wood. We appreciate how easily MDF cuts and installs, making it ideal for DIY projects and complex profile shapes. Paint finishes work beautifully on MDF surfaces, though staining isn’t possible due to the material’s composition.
Primed molding options come ready for your final paint application, saving preparation time during installation. These materials typically use MDF or wood cores with factory applied primer coats that ensure uniform coverage. We recommend primed options when you want consistent results without the tedious sanding and priming steps that raw materials require.
| Material | Moisture Resistance | Cost Level | Maintenance | Installation Ease |
|---|---|---|---|---|
| PVC | Excellent | High | Minimal | Moderate |
| Composite | Excellent | High | Minimal | Moderate |
| Wood | Poor (unsealed) | High | High | Difficult |
| MDF | Good | Low | Low | Easy |
| Primed | Good | Medium | Low | Easy |
Installation Tips for DIY Bathroom Molding
 7")
Successfully installing bathroom molding requires the right preparation and technique. We’ll guide you through the essential elements that make the difference between amateur and professional results.
Essential Tools and Materials
Measuring tools form the foundation of any successful molding project. We recommend using a quality measuring tape for basic dimensions and a laser level for ensuring perfect alignment across longer runs. Traditional levels work well for shorter sections but become challenging when spanning entire wall lengths.
Cutting equipment requires precision to achieve professional results. A miter saw delivers the clean angled cuts necessary for seamless corner joints. Hand saws can work for smaller projects but lack the consistency needed for multiple pieces. We suggest investing in a quality miter saw if you’re planning multiple bathroom renovations.
Fastening tools speed up installation while ensuring secure attachment. Nail guns provide quick securing of molding pieces and reduce the risk of hammer damage to delicate profiles. Traditional hammers and finish nails work but require more skill to avoid surface damage.
Finishing supplies complete the professional appearance. Caulk and caulk guns seal gaps between molding and wall surfaces, creating moisture barriers essential in bathroom environments. Wood filler fills nail holes and imperfections before painting. Quality brushes and rollers ensure smooth paint application over the completed installation.
Measuring and Cutting Techniques
Accurate measurement prevents costly mistakes and material waste. We always measure twice and cut once to ensure precision throughout the project. Start by measuring each wall section individually since bathroom walls rarely maintain perfect dimensions due to settling and construction variations.
Test fitting saves time and materials before final installation. Dry fit each piece in position to verify measurements and joint alignment. This technique identifies potential issues while adjustments remain easy to make.
Miter cuts require careful attention to achieve tight corner joints. Most bathroom corners measure 90 degrees, requiring 45 degree cuts on each joining piece. But, we recommend checking each corner with a square since walls often deviate from perfect angles.
Coping techniques create better fitting inside corners than simple miter cuts. This method involves cutting one piece square to the wall and shaping the second piece to follow the profile of the first. Professional installers prefer coping for inside corners because it accommodates slight wall irregularities.
Professional vs. DIY Installation
DIY installation offers important cost savings and personal satisfaction for homeowners with basic carpentry skills. Simple baseboard and basic trim projects typically fall within most DIY comfort zones. We estimate that DIY installations cost 60 to 70 percent less than professional services when factoring in tool purchases.
Skill requirements vary significantly based on molding complexity. Straight runs of baseboard molding require minimal experience, while crown molding and complex decorative trim demand advanced measuring and cutting skills. Beginners should start with simpler profiles before attempting intricate designs.
Time investment differs greatly between DIY and professional approaches. Professional installers complete most bathroom molding projects in one to two days, while DIY projects often extend over several weekends. We recommend planning extra time for learning curves and potential mistakes.
Professional installation becomes worthwhile for complex designs requiring specialized tools and techniques. Large scale projects, intricate crown molding, and custom millwork often justify professional costs through superior results and time savings. Consider professional help when working with expensive materials where mistakes prove costly.
Color and Finish Ideas for Bathroom Molding
 8")
Selecting the right colors and finishes for your bathroom molding can dramatically transform the space’s overall aesthetic. We’ll explore three distinct approaches that complement different design styles and personal preferences.
White and Neutral Molding Options
White molding remains the most popular choice for bathrooms, offering a clean and timeless appearance that works with virtually any design scheme. This classic option creates a crisp contrast against colored walls while maintaining a fresh, spa-like atmosphere that never goes out of style.
Neutral colors like beige and gray provide sophisticated alternatives that enhance your bathroom’s aesthetic without overwhelming the space. These versatile shades blend seamlessly with both warm and cool color palettes, allowing other design elements to take center stage.
Soft cream and off-white tones add warmth to bathrooms while maintaining the clean look that white provides. These subtle variations work particularly well in traditional and transitional bathroom designs where pure white might feel too stark.
Bold Accent Color Choices
Navy blue molding creates striking contrast when paired with neutral wall colors, transforming ordinary trim into a dramatic design statement. This bold choice works exceptionally well in coastal and contemporary bathroom styles where you want to make a strong visual impact.
Emerald green offers a luxurious accent option that brings natural elements into the bathroom environment. This rich color choice pairs beautifully with marble countertops and brass fixtures for an elegant, jewel-toned aesthetic.
Deep charcoal and black molding provide modern sophistication that works particularly well in minimalist bathroom designs. These dramatic choices create defined edges and architectural interest while maintaining a sleek, contemporary appearance.
Stain and Paint Finish Combinations
Combining stained wood with painted finishes adds visual depth to your molding design while creating interesting textural contrast. This approach works particularly well when you want to highlight exact architectural features or create focal points within the space.
Stained chair rails paired with painted wainscoting create appealing visual contrast that defines different wall sections while maintaining design cohesion. This classic combination allows you to incorporate natural wood tones without overwhelming the space with too much stained material.
Two-tone paint combinations using different sheens provide subtle sophistication while maintaining a cohesive color palette. We recommend using semi-gloss paint on the molding with eggshell or satin finishes on the walls for optimal moisture resistance and easy cleaning.
Budget-Friendly Bathroom Molding Solutions
 9")
We understand that achieving beautiful bathroom molding doesn’t require very costly, and there are many cost effective approaches that deliver impressive results.
Affordable Material Alternatives
Faux shiplap offers an excellent budget friendly option that’s often already primed and costs significantly less than traditional wood shiplap. This material creates a unique modern look while delivering the visual appeal you want without the premium price tag.
Beadboard wall paneling provides classic appearance at a fraction of traditional molding costs. We find this option particularly appealing because it’s easy to install and adds that coveted traditional touch to bathrooms without requiring extensive carpentry skills.
Peel and stick molding represents the ultimate in affordable convenience for homeowners seeking decorative details. This readily available option eliminates the need for extensive tools or professional installation while still delivering attractive results.
Simple Installation Projects
Adding decorative trim creates a cohesive look when combined with existing paneling using minimal tools and basic expertise. We recommend starting with this approach if you’re new to bathroom molding projects since it requires fewer materials and less time investment.
Creating a statement wall allows you to focus your efforts on one focal point rather than molding the entire room. This strategy uses bold colors or unique materials to maximize visual impact while keeping costs manageable and installation time reasonable.
Maximum Impact for Minimum Cost
Painting existing molding refreshes your bathroom’s appearance by simply updating colors to match new decor themes. We’ve seen this approach transform tired looking bathrooms into fresh modern spaces with nothing more than quality paint and proper preparation.
Using luxury vinyl tiles enhances the overall bathroom aesthetic by providing stylish and durable flooring that complements your molding choices. While not directly molding related, this moderate investment creates a cohesive design foundation that makes your molding details appear more expensive and professionally installed.
Conclusion
We’ve explored how strategic molding choices can transform your bathroom from ordinary to extraordinary. Whether you’re drawn to classic crown molding or modern minimalist profiles every option we’ve discussed offers unique benefits for your space.
The key to success lies in selecting moisture-resistant materials and coordinating your design elements throughout the room. PVC and composite options provide durability while wood adds natural warmth when properly maintained.
Your bathroom molding project doesn’t need to expensive or require professional expertise. With the right materials tools and techniques you can achieve stunning results that enhance both your home’s value and your daily experience.
Start with one element that speaks to you and build from there. Your dream bathroom is closer than you think.
Frequently Asked Questions
What types of molding work best in bathrooms?
Crown molding, baseboards, wainscoting, and chair rail molding are excellent choices for bathrooms. These options enhance visual appeal while providing practical benefits like moisture protection. Crown molding creates height and sophistication, baseboards protect floor edges, wainscoting adds texture and shields walls from water damage, and chair rail molding provides visual division and protection in high-humidity areas.
Which materials are most moisture-resistant for bathroom molding?
PVC, polyurethane, and composite materials offer the best moisture resistance for bathroom environments. These materials resist water damage, mold growth, and warping better than traditional wood. Aluminum is also excellent for certain applications. While wood molding can be used, it requires careful moisture management and regular maintenance to prevent deterioration in high-humidity bathroom conditions.
Can I install bathroom molding myself or should I hire a professional?
Many bathroom molding projects are DIY-friendly, especially simpler designs like baseboards and basic crown molding. You’ll need measuring tools, cutting equipment, fastening tools, and finishing supplies. However, complex designs or intricate trim work may warrant professional installation. Beginners should start with simpler projects and consider professional help for challenging installations requiring specialized techniques.
How high should chair rail molding be installed in a bathroom?
Chair rail molding should typically be installed 30 to 36 inches from the floor for optimal visual balance and effective moisture protection. This height provides practical wall protection while creating attractive visual division. The exact height can be adjusted based on your bathroom’s proportions and design preferences, but staying within this range ensures both functionality and aesthetic appeal.
What are the most budget-friendly bathroom molding options?
Affordable alternatives include faux shiplap, beadboard wall paneling, and peel-and-stick molding options. These materials offer impressive aesthetics without premium pricing. Simple installation projects like adding decorative trim or creating accent walls maximize visual impact while minimizing costs. Refreshing existing molding with paint is another cost-effective way to transform your bathroom’s appearance without major investment.
What colors work best for bathroom molding?
White and neutral tones provide a clean, timeless look that complements most bathroom styles. Bold accent colors like navy blue or emerald green create striking visual impact for those wanting drama. Two-tone combinations offer sophisticated appeal, while combining stained wood with painted finishes adds depth and texture. Choose colors that coordinate with your overall bathroom design scheme.
How do I ensure proper moisture protection with bathroom molding?
Use moisture-resistant materials like PVC or polyurethane, and apply proper caulking and sealing techniques to create effective moisture barriers. Ensure all joints are properly sealed, especially where molding meets walls, floors, or ceilings. Regular maintenance and inspection help identify potential moisture issues early. Proper ventilation in your bathroom also helps protect all molding installations from excessive humidity damage.