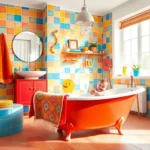
Transform your bathroom from ordinary to extraordinary with wainscoting – the timeless wall treatment that’s making a major comeback in modern home design. We’ve seen countless homeowners struggle with bland bathroom walls that lack personality and style. That’s where wainscoting steps in as the perfect solution to add visual interest depth and undeniable charm to any bathroom space.
Wainscoting isn’t just about aesthetics – it’s a practical investment that protects your walls from moisture damage while creating stunning focal points. Whether you’re drawn to classic beadboard for a cottage feel or sleek board-and-batten for contemporary vibes we’ll show you how this versatile design element can work in any bathroom size or style.
Ready to discover wainscoting ideas that’ll make your guests do a double-take? We’re diving into the most popular styles practical installation tips and creative ways to customize this wall treatment for your unique space. Let’s explore how the right wainscoting can turn your bathroom into a designer-worthy retreat.
Classic Wood Paneling for Timeless Bathroom Elegance
Wood wainscoting brings natural warmth and sophistication to bathroom spaces while maintaining its status as the most enduring design choice. Classic paneling styles have graced elegant bathrooms for generations and continue delivering exceptional aesthetic value.
Traditional Beadboard Wainscoting
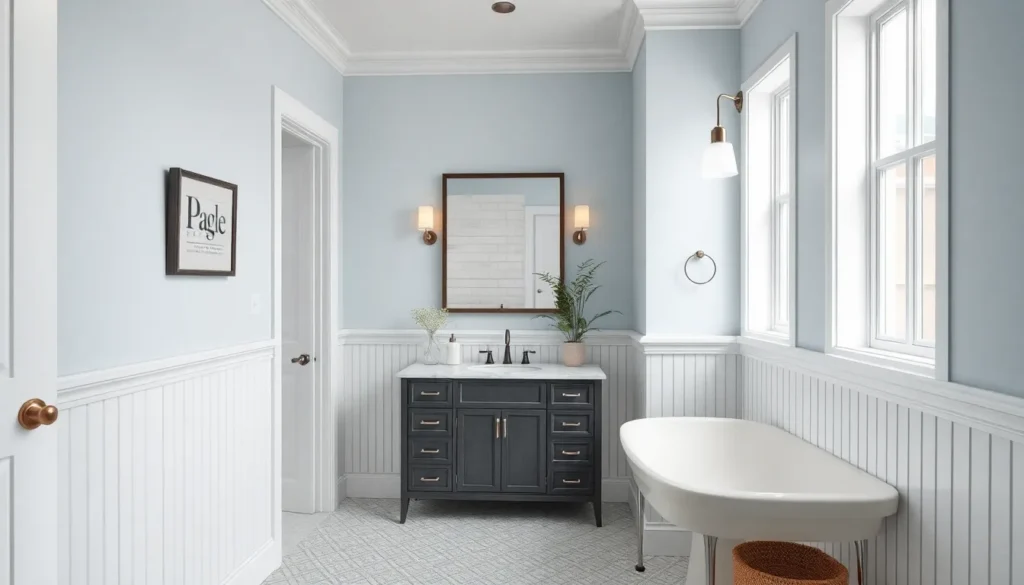
Vertical grooves define beadboard’s signature appearance, creating texture that transforms plain bathroom walls into architectural features. This classic style works exceptionally well in powder rooms and guest bathrooms where we want to achieve cottage charm or coastal elegance.
Installation typically extends 36 to 42 inches from the floor, allowing the paneling to provide moisture protection around bathtubs and vanities. We can paint beadboard in crisp whites for traditional appeal or choose soft blues and grays for coastal inspired spaces.
Maintenance remains straightforward with beadboard wainscoting since the vertical lines help disguise minor scratches and daily wear. Modern moisture resistant MDF beadboard offers durability comparable to solid wood while reducing installation costs by approximately 30 to 40 percent.
Raised Panel Wainscoting for Formal Appeal
Dimensional panels create sophisticated bathroom environments that rival luxury hotel suites and upscale spa facilities. Raised panel wainscoting features individual rectangular sections with beveled edges that cast subtle shadows and add visual depth.
Crown molding and chair rails complete the formal appearance by framing the paneled sections with architectural precision. We recommend installing raised panels at heights between 32 and 36 inches to maintain proper proportions with standard bathroom fixtures.
Premium hardwoods like oak, cherry, and maple deliver exceptional longevity when properly sealed against bathroom moisture. Paint grade options including poplar and pine provide similar aesthetic appeal at reduced material costs while accepting custom paint colors beautifully.
Shiplap Wainscoting for Farmhouse Style
Horizontal boards with overlapping edges create shiplap’s distinctive rustic character that brings farmhouse warmth to modern bathroom designs. Each board typically measures 6 to 8 inches in width and installs with visible gaps that enhance the casual, lived in appearance.
White or cream painted shiplap pairs perfectly with vintage inspired fixtures including clawfoot tubs, pedestal sinks, and bronze hardware. We often extend shiplap wainscoting to 48 inches in height to accommodate farmhouse style vanities and provide adequate wall protection.
Reclaimed wood shiplap adds authentic character through natural weathering and unique grain patterns that tell stories of previous use. New construction shiplap offers consistent dimensions and quality while allowing us to achieve the desired rustic aesthetic through strategic staining and distressing techniques.
Modern Tile Wainscoting Ideas for Contemporary Bathrooms

Tile wainscoting transforms contemporary bathrooms into sophisticated spaces that blend functionality with striking visual appeal. We’ll explore how different tile options can create stunning focal points while maintaining the practical benefits of traditional wainscoting.
Subway Tile Wainscoting Patterns
Horizontal layouts provide the most traditional approach to subway tile wainscoting, creating clean lines that complement modern bathroom aesthetics. We recommend this classic arrangement for bathrooms where you want to maintain a timeless yet contemporary feel.
Vertical installations offer a fresh twist on subway tile wainscoting by elongating wall space and adding visual height to smaller bathrooms. Installing tiles vertically creates an unexpected modern element that works particularly well in powder rooms.
Herringbone patterns transform standard subway tiles into ever-changing focal points through their distinctive zigzag formation. This arrangement adds sophisticated texture and visual interest to bathroom walls while maintaining the clean appeal of subway tile design.
Black and white combinations create striking graphic borders when applied to the lower half of bathroom walls. We’ve seen this pattern work exceptionally well when paired with traditional upper wall treatments and striped wallpaper accents.
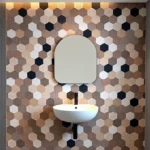
Hexagon Tile Design Options
Monochromatic hexagon schemes deliver cohesive contemporary looks by using single color palettes across wainscoting areas. These designs work particularly well in minimalist bathrooms where consistency and clean lines are priorities.
Multicolored hexagon arrangements introduce playful elements to bathroom wainscoting through strategic color mixing and pattern variation. We suggest limiting color combinations to two or three complementary tones to maintain visual harmony.
Marble hexagon applications combine the geometric appeal of hexagonal shapes with the luxurious texture of natural stone. This approach creates sophisticated wainscoting that serves as both functional protection and decorative statement.
Large Format Tile Applications
Full wall coverage using oversized tiles creates seamless, minimalistic wainscoting that eliminates grout lines and visual interruptions. We recommend this approach for contemporary bathrooms where clean, unbroken surfaces are desired.
Accent wall installations apply large format tiles to single bathroom walls, creating dramatic focal points without overwhelming the entire space. This technique works particularly well behind vanities or in shower areas.
Marble tile wainscoting featuring large format subway tiles with border trim delivers sophisticated elegance to all white bathroom designs. This approach can extend as wrap around backsplash applications for cohesive contemporary styling.
Budget-Friendly DIY Bathroom Wainscoting Solutions

We’ve explored luxurious tile and wood options, but beautiful bathroom wainscoting doesn’t have to expensive. Affordable DIY answers can deliver the same stunning visual impact while keeping costs manageable for any budget.
Paintable MDF Wainscoting Panels
MDF panels offer the most cost-effective route to achieving traditional wainscoting elegance. We recommend purchasing pre-cut panels to save both time and effort during your bathroom renovation project. The installation process involves applying adhesive to each panel’s back surface and securing them with finishing nails for added stability.
Alignment becomes crucial for professional-looking results. We always use a level to ensure each panel sits perfectly straight before finalizing the installation. The finishing touches make all the difference, so we attach chair rail or decorative molding to the top edge for a polished appearance.
Preparation creates flawless painted surfaces. We fill any gaps between panels with wood filler, sand smooth, then apply primer before painting. This method delivers the classic wainscoting look at a fraction of traditional wood panel costs.
Peel and Stick Tile Alternatives
Peel and stick tiles revolutionize bathroom wainscoting installation for beginners. We love how these adhesive tiles mimic traditional wood wainscoting patterns without requiring any specialized tools or carpentry skills. The installation couldn’t be simpler – just peel off the backing and press the tiles directly onto clean wall surfaces.
Creating the half wall effect becomes effortless with this approach. We position the tiles to cover approximately one-third of the wall height, matching traditional wainscoting proportions. The variety of available patterns includes wood-look planks, subway tile designs, and decorative geometric options.
Moisture resistance makes these tiles ideal for bathroom environments. We appreciate how they withstand humidity and splashing without warping or peeling like some traditional materials might over time.
Faux Wood Vinyl Wainscoting
Vinyl wainscoting combines durability with authentic wood appearance at budget prices. We prefer this option for high-moisture bathroom areas because vinyl naturally resists water damage and humidity fluctuations. The realistic wood grain patterns fool most visitors into thinking you’ve installed genuine hardwood panels.
Installation follows similar steps to MDF panels but with added moisture benefits. We apply construction adhesive to the vinyl panel backs and secure them firmly to wall surfaces. The lightweight material makes handling easier during solo installation projects.
Long-term maintenance stays minimal with vinyl wainscoting answers. We simply wipe down surfaces with standard bathroom cleaners, and the material won’t require periodic refinishing like natural wood options. This durability makes vinyl an excellent investment for busy family bathrooms.
Luxury Stone and Natural Material Wainscoting

Natural stone wainscoting transforms ordinary bathrooms into sophisticated retreats that rival high-end spas. These premium materials deliver unmatched durability while creating visual drama that elevates your entire space.
Marble Wainscoting for Spa-Like Bathrooms
Marble wainscoting creates an instantly luxurious atmosphere that turns your bathroom into a personal sanctuary. The natural veining patterns and glossy finish provide timeless elegance that never goes out of style. Humidity resistance makes marble particularly well-suited for bathroom environments where moisture levels fluctuate throughout the day.
Modern fixtures pair beautifully with marble’s sophisticated appearance, especially when you choose neutral color palettes that complement the stone’s natural tones. Regular sealing prevents staining and maintains the lustrous finish that makes marble so desirable. Cleaning routines should include gentle products that preserve the stone’s natural beauty without causing damage.
Natural Stone Accent Walls
Granite, slate, and quartz offer dramatic possibilities for creating stunning accent walls or partial wainscoting installations. Color ranges span from deep charcoals to warm earth tones, giving you flexibility to match any design vision. Texture options include smooth polished finishes for modern aesthetics or rugged surfaces for rustic charm.
Moisture resistance properties make these stones ideal for bathroom applications where water exposure is constant. Professional installation becomes necessary due to the substantial weight and precise cutting requirements these materials demand. Weight considerations require proper wall reinforcement to ensure long-term stability and safety.
Travertine and Limestone Options
Travertine brings warm, earthy tones that create a naturally calming environment perfect for relaxation. The softer, more porous texture offers subtle visual interest without overwhelming your space. Limestone provides more uniform patterning while maintaining the same tranquil aesthetic that promotes a spa-like atmosphere.
Both materials blend seamlessly with various décor styles, from Mediterranean-inspired designs to contemporary minimalist approaches. Sealing requirements enhance water resistance and prevent staining that could compromise the stone’s natural beauty. Installation as wainscoting contributes significantly to creating that coveted spa retreat ambiance you’re seeking.
Creative Mixed-Material Wainscoting Designs

Combining different materials creates stunning visual depth and texture in bathroom wainscoting. We’ll explore innovative ways to blend materials for unique and sophisticated bathroom designs.
Wood and Tile Combination Ideas
Marble and wood pairings create sophisticated contrasts that elevate any bathroom space. We recommend using marble subway tiles for the main wainscoting surface while incorporating wood trim accents to add warmth and visual interest. This combination works particularly well when the marble creates a wrap-around effect throughout the bathroom.
Wood effect panels offer durability without sacrificing style in humid environments. We suggest using MDF, vinyl, or PVC wood effect panels paired with complementary tile or stone elements. These materials resist moisture damage while maintaining the authentic appearance of natural wood.
Beadboard and applied molding combinations bring classic charm to modern bathrooms. We’ve found that incorporating traditional beadboard wainscoting with carefully selected applied molding creates a timeless yet updated look that suits various design styles.
Shiplap and stone integration delivers modern farmhouse appeal with contemporary functionality. We recommend combining vertical shiplap installations with natural stone or tile accents to achieve this popular aesthetic. This pairing works especially well in bathrooms seeking rustic elegance.
Metal Accent Integration
Metal trim applications add contemporary sophistication to traditional wainscoting designs. We incorporate brushed nickel, brass, or matte black metal trim to create clean lines and modern edges. These accents work particularly well when coordinated with existing bathroom fixtures and hardware.
Metal framed elements create striking focal points within wainscoting installations. We suggest integrating metal framed mirrors or decorative panels directly into the wainscoting design. This approach adds architectural interest while maintaining the overall cohesive look.
Industrial style fixtures complement metal accent wainscoting perfectly. We recommend incorporating exposed metal pipes, industrial lighting, or metal shelving units that seamlessly blend with the wainscoting’s metal components.
Glass Panel Wainscoting Features
Sleek glass installations provide contemporary elegance while maintaining practical benefits. We use tempered glass panels within wainscoting frameworks to create sophisticated, easy to clean surfaces. These panels reflect light beautifully and make smaller bathrooms appear more spacious.
Frosted glass applications offer privacy without sacrificing natural light flow. We incorporate frosted or textured glass panels that maintain the open feeling while providing visual separation. This approach works exceptionally well in powder rooms and guest bathrooms.
Backlit glass features create dramatic ambient lighting effects within wainscoting designs. We install LED lighting behind translucent glass panels to achieve a spa like atmosphere. This technique transforms ordinary wainscoting into a stunning architectural feature that serves as both lighting and wall protection.
Mixed transparency levels add visual complexity to glass panel wainscoting. We combine clear, frosted, and tinted glass sections to create ever-changing patterns and textures. This approach allows for creative expression while maintaining the functional benefits of traditional wainscoting.
Height and Proportion Guidelines for Bathroom Wainscoting

Choosing the right height for your bathroom wainscoting determines the overall balance and visual impact of your space. Getting these proportions correct ensures your wainscoting enhances rather than overwhelms your bathroom’s aesthetic.
Standard Chair Rail Height Recommendations
Traditional chair rail heights typically range from 24 to 36 inches from the floor, creating a classic foundation for most bathroom designs. We’ve found that 30 inches works exceptionally well for standard 8-foot ceilings, providing the ideal balance between wall protection and visual appeal.
Measuring from your bathroom floor to the desired height ensures consistent installation across uneven surfaces. Consider your existing fixtures when determining the exact height, as towel bars and light switches should integrate seamlessly with your wainscoting design.
Bathroom vanity heights often influence the optimal chair rail placement, with most installations aligning just above or below the vanity countertop. This approach creates a cohesive look that ties your wainscoting into the room’s functional elements.
Full-Height Wainscoting Applications
Full-height wainscoting covers the entire wall from floor to ceiling, creating a dramatic and sophisticated bathroom atmosphere. Larger bathrooms benefit most from this approach, as the complete wall coverage adds elegance without making the space feel cramped.
Ceiling height plays a crucial role in determining whether full-height wainscoting works in your bathroom. Rooms with 9-foot or higher ceilings can handle the visual weight of full wall coverage, while standard 8-foot ceilings may feel overwhelmed by this extensive treatment.
Material selection becomes even more important with full-height applications, as the expanded surface area creates a dominant design element. Light-colored materials like white beadboard or pale wood tones help maintain an airy feeling even though the extensive coverage.
Proportional Considerations for Small Bathrooms
Small bathroom wainscoting works best when limited to the lower half of the wall to avoid overwhelming the limited space. We recommend keeping wainscoting height between 24 to 30 inches in compact bathrooms to maintain proper visual proportions.
Vertical elements like board and batten can actually make small bathrooms appear taller when installed at the appropriate height. The key lies in choosing narrower board widths and spacing that complement rather than compete with your bathroom’s scale.
Color coordination between your wainscoting and upper wall sections creates visual continuity that makes small bathrooms feel more spacious. Light, neutral tones work particularly well in these applications, reflecting light and opening up the perceived space.
Color and Finish Options to Complement Your Bathroom Decor

Selecting the right color and finish for your bathroom wainscoting transforms the entire atmosphere of your space. We’ll explore various options that enhance both functionality and visual appeal in your bathroom design.
Painted Wainscoting Color Schemes
Light colors like white or cream create a clean and airy feel that makes your bathroom appear larger and brighter. We recommend these neutral tones for smaller bathrooms where maximizing visual space is essential.
Darker tones add depth and contrast to your bathroom design, especially when paired with bright fixtures that create striking visual balance. Bold colors like navy blue or charcoal gray work particularly well in larger bathrooms with ample natural light.
Coordinating painted wainscoting with your existing color palette ensures a cohesive look throughout your bathroom. Consider using paint colors that complement your tile work, vanity, and other design elements for maximum impact.
Natural Wood Stain Finishes
Traditional warm tones from oak, maple, or cherry create a timeless elegance that works beautifully in classic bathroom designs. These natural wood options bring warmth and texture to your space while maintaining durability in humid conditions.
Modern stained MDF offers a more budget friendly alternative that provides excellent water resistance for bathroom environments. This versatile material accepts stain beautifully and delivers the appearance of natural wood at a fraction of the cost.
Vinyl wainscoting with wood grain finishes provides exceptional durability and moisture resistance while mimicking the appearance of real wood. We find this option particularly suitable for high moisture areas where traditional wood might not perform as well.
Coordinating with Existing Bathroom Fixtures
Matching your wainscoting with flooring materials and colors creates a cohesive foundation that ties your entire bathroom design together. Consider how different finishes interact with your existing tile, hardwood, or luxury vinyl flooring.
Aligning wainscoting colors or finishes with bathroom cabinets produces a harmonious appearance that feels intentionally designed rather than randomly assembled. This coordination works especially well when using similar wood tones or complementary paint colors.
Lighting fixtures that complement your wainscoting color scheme enhance the overall ambiance and make your design choices feel purposeful. Warm lighting pairs beautifully with natural wood finishes, while cool lighting accentuates painted wainscoting in lighter shades.
Cabinet hardware and faucet finishes should also coordinate with your wainscoting choice to maintain design consistency throughout your bathroom space.
Moisture-Resistant Wainscoting Materials and Installation Tips

Choosing the right materials and proper installation techniques is crucial for bathroom wainscoting success. We’ll explore the most durable options and essential installation practices that ensure your wainscoting withstands moisture while maintaining its beauty.
PVC wainscoting stands out as the most moisture resistant option, offering complete waterproof protection with minimal maintenance requirements. This synthetic material resists warping, cracking, and mold growth while providing excellent durability in high humidity environments.
Medium-density fiberboard (MDF) provides an affordable alternative that requires proper sealing to prevent moisture damage. While budget friendly, MDF panels need careful preparation and multiple coats of waterproof primer and paint to achieve adequate moisture resistance.
Solid wood wainscoting delivers timeless elegance but demands meticulous sealing to prevent warping and water damage. Cedar and teak naturally resist moisture better than other wood species, though all wood options require regular maintenance to preserve their appearance.
Tile wainscoting offers superior water resistance with easy cleaning capabilities, making it ideal for shower areas and high splash zones. Ceramic and porcelain tiles provide excellent moisture protection while allowing for creative design patterns and color combinations.
Waterproof Sealant Applications
Edge sealing creates the first line of defense against moisture infiltration by applying waterproof sealant around all panel edges. We recommend using marine grade polyurethane sealant for maximum protection against bathroom humidity and water exposure.
Gap filling between panels and baseboards requires high quality caulk that maintains flexibility as materials expand and contract. Silicone based caulks provide superior adhesion and moisture resistance compared to latex alternatives.
Joint sealing at corners and intersections needs special attention since these areas experience the most stress from temperature changes. Apply sealant in thin, even beads and smooth with a damp finger for professional looking results.
Reapplication schedules vary by product type, with most sealants requiring inspection every 12 to 18 months. Check for cracks, gaps, or peeling that could allow moisture penetration and compromise your wainscoting protection.
Proper Ventilation Considerations
Exhaust fan installation dramatically reduces moisture accumulation that can damage even the most resistant wainscoting materials. We recommend fans rated for at least 1 CFM per square foot of bathroom area to ensure adequate air circulation.
Air circulation patterns should direct humid air away from wainscoting surfaces toward exhaust vents. Position fans near shower areas where moisture concentration is highest to maximize effectiveness.
Window ventilation provides natural moisture control when weather permits, creating cross breezes that help dry surfaces quickly. Open windows during and after showers to supplement mechanical ventilation systems.
Humidity monitoring helps maintain optimal moisture levels below 50% to prevent mold growth and material degradation. Digital hygrometers provide accurate readings that help you adjust ventilation timing and duration.
Maintenance Requirements for Different Materials
PVC maintenance involves simple cleaning with mild soap and water, making it the most low maintenance option available. This material resists staining, scratching, and moisture damage without requiring periodic refinishing or sealing.
MDF and solid wood care demands regular inspection for moisture damage signs like discoloration, warping, or soft spots. Repaint or reseal these materials every 2 to 3 years to maintain their protective barrier against bathroom humidity.
Tile maintenance focuses on grout cleaning and sealing to prevent water penetration behind the tile surface. Clean grout lines weekly with mildew resistant cleaner and reseal annually to maintain water resistance.
Inspection schedules should occur monthly for wood materials and quarterly for synthetic options to catch problems early. Look for loose panels, failing caulk, or discoloration that indicates moisture infiltration requiring immediate attention.
Conclusion
Bathroom wainscoting offers endless possibilities to transform your space into something truly special. Whether you’re drawn to classic wood paneling or contemporary tile designs we’ve shown you how to achieve professional results within any budget.
The key to success lies in choosing materials that complement your bathroom’s unique style while prioritizing moisture resistance and proper installation. From DIY-friendly options to luxurious natural stone applications there’s a wainscoting solution for every homeowner.
Remember that the right height proportions and color choices can dramatically impact your bathroom’s visual appeal. With careful planning and attention to detail you’ll create a stunning focal point that adds both beauty and value to your home for years to come.
Frequently Asked Questions
What is wainscoting and why is it good for bathrooms?
Wainscoting is a decorative wall treatment that covers the lower portion of walls with panels or tiles. In bathrooms, it provides both aesthetic appeal and practical protection against moisture damage. It helps prevent water damage to walls while adding visual interest and can make small bathrooms appear larger when done in light colors.
What are the most popular types of wainscoting for bathrooms?
The most popular types include classic beadboard with vertical grooves, raised panel wainscoting for sophistication, shiplap for farmhouse style, subway tile patterns, hexagon tiles, and large format tiles for modern looks. Each style offers different aesthetic appeals while providing moisture protection.
How high should bathroom wainscoting be installed?
Traditional wainscoting height ranges from 24 to 36 inches, with 30 inches being ideal for standard 8-foot ceilings. For smaller bathrooms, keeping wainscoting at or below 30 inches helps maintain visual space. Larger bathrooms can accommodate full-height wainscoting for dramatic impact.
What are the best moisture-resistant wainscoting materials?
PVC is the most moisture-resistant option, followed by tile wainscoting which offers superior water resistance. MDF panels are budget-friendly but require proper sealing. Solid wood needs careful waterproofing. Peel-and-stick tiles and faux wood vinyl are also excellent moisture-resistant alternatives for DIY installation.
Can I install bathroom wainscoting myself?
Yes, many wainscoting options are DIY-friendly. Paintable MDF panels, peel-and-stick tiles, and faux wood vinyl are beginner-friendly options. However, natural stone and heavy materials typically require professional installation. Proper edge sealing and joint sealing are crucial for moisture protection regardless of installation method.
What colors work best for bathroom wainscoting?
Light colors like white or cream create an airy feel in smaller bathrooms and reflect light well. Darker tones can add depth in larger bathrooms. Natural wood stains provide classic appeal, while modern finishes offer durability. Always coordinate wainscoting colors with existing fixtures and flooring for cohesive design.
How do I maintain bathroom wainscoting?
Maintenance depends on the material. Tile and PVC require minimal upkeep with regular cleaning. Wood and MDF need periodic inspection of seals and potential resealing. Ensure proper bathroom ventilation to prevent moisture buildup. Clean regularly with appropriate cleaners for your specific material type to maintain appearance and longevity.
Can I mix different materials in my wainscoting design?
Yes, mixed-material designs create stunning visual depth. Popular combinations include marble subway tiles with wood trim, beadboard with applied molding, and shiplap with stone accents. You can also incorporate metal accents like brushed nickel or glass panels for contemporary sophistication while maintaining traditional wainscoting benefits.