We’ve all scrolled through social media and wondered how influencers create those stunning bathroom shots that look effortlessly chic. The truth is, your bathroom can become the perfect backdrop for incredible photos – you just need to know the right techniques and styling tricks.
Bathroom photoshoots aren’t just about vanity selfies anymore. They’ve evolved into an art form that combines natural lighting, creative angles, and thoughtful styling to produce magazine-worthy content. Whether you’re building your personal brand or simply want to elevate your social media game, mastering bathroom photography opens up endless creative possibilities.
The secret lies in transforming your everyday space into a photogenic paradise. From utilizing that gorgeous natural light streaming through your window to incorporating plants and luxurious textures, we’ll show you how to turn your bathroom into a professional-looking studio. Get ready to discover game-changing ideas that’ll have your followers wondering where you hired your photographer.
Mirror Selfie Magic: Classic Bathroom Photography Poses
Mirror selfies remain the cornerstone of bathroom photography, offering endless creative possibilities. We’ll explore fundamental poses that transform ordinary reflections into captivating visual content.
Full Body Mirror Shots
Position yourself 3-4 feet away from the mirror to capture your entire silhouette while maintaining sharp image quality. We recommend standing at a slight angle rather than directly facing the mirror to create more ever-changing proportions and avoid awkward direct eye contact with the camera.
Experiment with different heights by having someone hold your phone at chest level, waist level, or even floor level for dramatic perspective shifts. Lower angles elongate your legs and create a more statuesque appearance, while higher angles provide a classic, flattering viewpoint.
Use your bathroom’s corners to your advantage by positioning yourself diagonally across from corner mirrors. This technique adds depth to your shots and incorporates more of your bathroom’s design elements like decorative tiles, plants, or stylish fixtures.
Create movement by adjusting your posture mid-shot. Try stepping forward on one foot, placing one hand on your hip, or gently touching your hair to add natural, candid energy to static mirror poses.
Close-Up Reflection Portraits
Focus on facial expressions by positioning your phone 12-18 inches from the mirror surface for intimate portrait shots. We suggest tilting your head slightly to one side while keeping your shoulders squared to create visual interest without appearing forced.
Use bathroom lighting strategically by shooting during golden hour when natural window light creates soft, warm tones across your face. Morning light between 7-9 AM typically provides the most flattering illumination for close-up reflection work.
Frame your face using your hands, hair, or bathroom accessories like towels or skincare products. This technique draws attention to your facial features while adding context that tells a story about your daily routine.
Experiment with mirror angles by shooting slightly above or below eye level to find your most photogenic perspective. Most people look best when the camera sits just above their eye line, creating subtle shadows that define facial structure.
Multiple Mirror Angles
Combine vanity mirrors with full-length mirrors to create layered reflections that add complexity and visual depth to your bathroom photography. Position yourself where both mirrors catch different angles of your profile or outfit details.
Use compact mirrors as props to create interesting geometric patterns within your primary mirror shot. Hold a small handheld mirror to reflect light onto your face or capture unique double-reflection effects that showcase your creativity.
Incorporate medicine cabinet mirrors by opening them at various angles to fragment your reflection into multiple panels. This technique works particularly well for artistic shots that play with symmetry and repetition.
Take advantage of corner bathroom setups where multiple mirrors meet to create infinite reflection tunnels. Position yourself carefully to avoid creating dizzying effects while still capturing the dramatic visual impact of endless reflections stretching into the background.
Bathtub Beauty: Luxurious Soak Photography Ideas

Moving beyond mirror selfies, we’ll explore how bathtubs transform into stunning photography backdrops that exude luxury and sophistication. These setups create dramatic focal points that elevate your bathroom photoshoot from ordinary to extraordinary.
Bubble Bath Glamour Shots
Create dreamy atmospheres with frothy bubble baths that naturally soften lighting and enhance skin tones. We recommend focusing on close-up shots that capture facial expressions peeking through the bubbles for an intimate, serene feel.
Position your camera to capture the curve of shoulders or hands resting gracefully on the tub’s edge. These angles emphasize comfort and relaxation while maintaining an elegant composition.
Use the opacity of bubbles as a natural diffuser that creates flattering lighting conditions. The playful texture adds visual interest while providing natural coverage for more artistic shots.
Experiment with different bubble densities to achieve varying levels of coverage and texture. Thicker bubbles create more dramatic hiding effects, while lighter foam allows for subtle skin tones to show through.
Minimalist Clean Lines
Focus on simplicity and elegance by utilizing white or light-colored backgrounds that create crisp, modern compositions. We suggest choosing bathrooms with uncluttered spaces and clean architectural lines.
Draw attention to your subject by keeping decor minimal and letting the bathroom’s natural geometry frame your shots. Simple fixtures and streamlined design elements work best for this aesthetic.
Use natural lighting from windows or skylights to enhance the clean, bright atmosphere. These lighting conditions work particularly well for fashion and lifestyle photography styles.
Choose neutral color palettes that complement the minimalist approach. White, cream, and soft gray tones create cohesive looks that feel fresh and contemporary.
Flower Petal Arrangements
Transform ordinary bathtubs into visually striking centerpieces by floating colorful flower petals across the water’s surface. This technique adds natural texture and vibrant color to your compositions.
Scatter petals loosely for an organic, romantic feel, or arrange them in deliberate patterns that complement your pose. Rose petals, lavender, and seasonal blooms work particularly well for this style.
Plan your petal placement before entering the tub to ensure the arrangement looks intentional rather than random. We recommend having someone assist with final adjustments once you’re positioned.
Consider seasonal flower choices that match your shoot’s mood and color scheme. Spring blooms like cherry blossoms create soft, delicate looks, while bold roses add dramatic color contrast to your bathroom setting.
Shower Steam Sessions: Moody Atmospheric Photos

Steam transforms ordinary bathroom spaces into atmospheric studios perfect for capturing dramatic, moody photography. We’ll explore how to harness this natural element to create stunning visuals that elevate your bathroom photoshoot game.
Silhouette Through Glass
Silhouette photography through frosted glass creates artistic compositions that emphasize form over detail. Position yourself behind shower doors or glass partitions to capture striking outlines that maintain privacy while delivering visual impact. The glass naturally diffuses harsh lighting and creates a dreamy, ethereal quality in your images. We recommend experimenting with different poses – standing, sitting, or reaching upward – to create ever-changing shapes against the translucent surface.
Backlighting becomes your secret weapon for powerful silhouette effects. Turn on bright bathroom lights behind the glass while keeping the camera side dimmer to achieve maximum contrast. Steam buildup on the glass adds texture and depth to your silhouettes, making them appear more mysterious and captivating. Try varying your distance from the glass to create different levels of clarity and abstraction in your final shots.
Water Droplet Details
Water droplets on glass surfaces create mesmerizing macro photography opportunities that showcase intricate details. Focus your camera on individual droplets clinging to shower doors or mirrors to capture their perfect spherical shapes and light-refracting properties. These close-up shots work exceptionally well as artistic elements or backgrounds for your bathroom photography portfolio.
Droplets on skin add a fresh, natural element to your photos that suggests cleanliness and vitality. Capture water beading on shoulders, arms, or legs to create textural interest in your compositions. The key lies in timing – shoot immediately after water contact when droplets are perfectly formed and haven’t yet begun to stream down. We suggest using a macro lens or your phone’s close-up mode to achieve sharp, detailed results.
Lighting direction significantly impacts how water droplets appear in your photographs. Side lighting creates dramatic shadows and highlights that emphasize the three-dimensional quality of each droplet. Experiment with different angles to find the sweet spot where droplets catch and reflect light most beautifully.
Steamy Mirror Effects
Steamy mirrors produce ethereal reflections that add a dreamy, romantic quality to bathroom photography. The condensation creates a natural soft focus effect that flatters skin tones and reduces harsh details. We find that partially steamed mirrors work best – they maintain enough clarity for recognizable reflections while adding that mystical, otherworldly atmosphere.
Drawing or writing in steam opens up creative storytelling possibilities for your photoshoots. Use your finger to create heart shapes, write messages, or draw simple designs in the condensation before capturing your reflection. These temporary artworks add personal touches and narrative elements to your bathroom photography that viewers find captivating and relatable.
Mirror placement and steam density control the mood of your final images. Position yourself at different distances from steamy mirrors to achieve varying levels of clarity and abstraction. Dense steam creates mysterious, almost ghostly effects, while lighter condensation maintains more detail while still providing that soft, romantic atmosphere. Experiment with breathing on mirrors to create controlled steam patterns exactly where you need them for your composition.
Vanity Lighting Perfection: Makeup and Beauty Shots

Moving from atmospheric shower photography to precise vanity setups, we’ll explore how proper lighting transforms ordinary beauty routines into stunning visual content.
Getting Ready Process Photos
Document your complete preparation routine from start to finish using strategic vanity positioning. We recommend starting with bare-faced shots that showcase natural features, then capturing each step of your beauty transformation. Position yourself at a 45-degree angle to the mirror for the most flattering perspective while maintaining good lighting coverage.
Focus on detail shots that highlight exact actions like applying foundation, contouring, or perfecting winged eyeliner. Capture the concentration on your face as you work, emphasizing the artistry behind each beauty step. Use your phone’s timer function or a remote shutter to maintain steady hands while photographing intricate makeup applications.
Create ever-changing sequences by photographing the same action from multiple angles within seconds of each other. Show the progression of eyeshadow application across three or four frames to demonstrate the building process. Include overhead shots of your vanity setup with products arranged around you to provide context for your beauty routine.
Product Flat Lay Arrangements
Transform your vanity surface into a carefully curated display using color coordination and geometric patterns. Arrange makeup products, skincare items, and beauty tools in circles, lines, or triangular formations to create visual interest. We suggest using neutral backgrounds like marble countertops or white vanity surfaces to make colorful products pop.
Layer different textures by mixing matte foundation bottles with glossy lip products and metallic eyeshadow palettes. Include natural elements like small plants, flowers, or textured towels to add depth and warmth to your arrangement. Position items at varying heights using small boxes or product lids underneath to create dimensional layers.
Experiment with negative space by leaving strategic gaps between product groupings rather than filling every inch of your frame. This breathing room allows viewers’ eyes to rest and appreciate individual products more effectively. Consider seasonal themes by incorporating autumn leaves, winter pine sprigs, or spring flowers to keep your content fresh and relevant.
Before and After Transformations
Create compelling transformation stories by photographing identical poses and lighting conditions for both before and after shots. We recommend using a tripod or phone stand to maintain consistent framing between your pre-makeup and post-makeup photos. Document the dramatic difference proper lighting makes in showcasing your beauty transformation.
Capture side-by-side comparisons that highlight exact makeup techniques like contouring, highlighting, or dramatic eye looks. Use split-screen editing to show both images simultaneously, allowing viewers to appreciate the full impact of your beauty routine. Include close-up shots of individual features like eyes, lips, or cheekbones to showcase detailed work.
Time-lapse photography offers another powerful way to document your complete transformation process. Set your camera to capture images every 30 seconds throughout your routine, then compile them into a fast-paced video showing your complete beauty evolution. This approach works particularly well for complex looks that take 45 minutes or longer to complete.
Creative Prop Integration: Adding Personality to Bathroom Shoots

Props transform ordinary bathroom photography into compelling visual stories that reflect your unique style. We’ll explore how strategic prop placement elevates your shots from simple documentation to artful compositions.
Towel and Robe Styling
Crisp white towels draped over bathtub edges create that coveted spa-like atmosphere we’re all chasing. We recommend folding towels in thirds and positioning them at different heights around your shooting area for visual depth. Luxurious robes become powerful styling elements whether you’re wearing them or strategically placing them nearby on hooks or chairs.
Contrasting colors make subjects pop against neutral backgrounds – think dark navy towels against white marble or cream-colored surfaces. We’ve found that monogrammed towels add a premium, personalized touch that suggests luxury and attention to detail. Fluffy textures catch light beautifully and create visual interest through their organic shapes and shadows.
Plant and Greenery Accents
Succulents positioned on countertops bring life and freshness to sterile bathroom environments. We love placing small palms or ferns near bathtubs to create natural frames for our subjects. Suspended planters add vertical interest and draw the eye upward, creating more ever-changing compositions.
Eucalyptus branches scattered around the tub or floating delicate blooms in bathwater introduce organic elements that soften harsh bathroom lines. Outdoor bathroom settings benefit from leafy vines or wild clover that create natural backdrops. We’ve discovered that mixing different plant heights and textures adds layers of visual complexity that cameras love to capture.
Candle and Ambient Lighting
Soft candlelight placed strategically around bathtubs creates that warm, inviting glow that makes everything look more romantic. We position candles at varying heights on shelves, tub edges, and nearby surfaces to avoid flat lighting. LED string lights draped across mirrors or towel racks add subtle illumination without overwhelming the scene.
Natural window light combined with warm candle glow creates the perfect balance between fresh and cozy atmospheres. We experiment with different light temperatures – warm candlelight against cool natural light – to achieve dramatic mood shifts in our images. Fairy lights tucked behind plants or reflected in mirrors create magical bokeh effects that add depth to our compositions.
Black and White Bathroom Photography: Timeless Elegance

Black and white photography transforms bathroom shoots into sophisticated artistic statements that never go out of style. We’ll explore how eliminating color distractions allows us to focus on form, texture, and the dramatic interplay of light and shadow.
High Contrast Dramatic Shots
High contrast techniques create powerful visual impact by emphasizing the stark differences between light and shadow in our bathroom compositions. We achieve this dramatic effect through strategic lighting placement, using sidelights or overhead sources to cast pronounced shadows across porcelain fixtures, marble surfaces, and wooden accents.
Position your subject against dark backgrounds or under focused spotlight to enhance the cinematic quality of each shot. Strong lighting creates depth in materials like ceramic tiles and metal fixtures, bringing out textures that color photography might miss. We recommend experimenting with backlighting through frosted glass or positioning lights at sharp angles to carve out dramatic silhouettes.
The moody atmosphere these shots produce works particularly well with modern bathroom designs featuring clean lines and geometric shapes. Shadow patterns from window blinds or decorative screens add another layer of visual interest to our compositions.
Soft Gray Tone Portraits
Soft gray tones offer a gentler approach that flatters subjects while maintaining the timeless appeal of monochrome photography. We create this ethereal effect using diffused lighting sources like window light or softbox setups that eliminate harsh shadows and maintain natural skin tones.
Position your subject near large windows during golden hour or overcast conditions for the most flattering natural light. This technique works beautifully for intimate portraits where we want to capture serene expressions and delicate features without overwhelming contrast.
We achieve the most elegant results by keeping compositions simple and uncluttered, allowing the subtle gradations of gray to tell the story. Fabric textures from towels and robes become particularly beautiful in this style, creating layers of soft contrast that complement human subjects.
Architectural Detail Focus
Architectural elements become striking focal points when we remove color distractions and concentrate on shapes, patterns, and textures. Close up shots of curved faucets, decorative moldings, and patterned tiles showcase the craftsmanship and design details that make each bathroom unique.
We emphasize symmetrical layouts and geometric patterns by positioning our camera to highlight repeating elements like subway tiles or hexagonal floor patterns. The interplay between smooth porcelain surfaces and textured materials creates visual depth that draws viewers into the composition.
Focus on hardware details like vintage brass handles, modern chrome fixtures, or ornate mirror frames to capture the personality of different bathroom styles. These detail shots work exceptionally well as part of a larger series, building a complete visual story of the space’s character and design philosophy.
Natural Light Bathroom Sessions: Golden Hour Magic

Natural light transforms bathroom photography from ordinary snapshots into professional-quality images that rival studio portraits. We’ll explore how to harness the soft, warm glow of golden hour and other natural lighting conditions to create stunning bathroom photographs.
Window Light Portraits
Position your subject near bathroom windows to capture the most flattering natural illumination available. Window light provides diffused, even lighting that enhances skin tones and highlights facial details while minimizing camera noise for crisp results. We recommend shooting during midday for strong, direct light that creates dramatic contrast and depth.
Face your subject toward the window to maximize the natural glow and eliminate harsh shadows that can create unflattering angles. Overcast days offer softer lighting conditions that work beautifully for gentle, romantic portraits with reduced contrast. Place subjects at different distances from the window to control light intensity and create varying moods in your shots.
Experiment with side lighting by positioning your subject perpendicular to the window for dramatic half-lit portraits. This technique creates striking shadow play across facial features and adds artistic depth to your compositions. We find that frosted bathroom windows work exceptionally well as natural diffusers, creating soft, even lighting without harsh directional shadows.
Morning Routine Documentation
Capture authentic moments by photographing genuine morning self-care rituals as they unfold naturally. Document subjects brushing teeth, washing faces, or applying skincare products while morning light streams through bathroom windows. We suggest using candid angles and close-up shots to convey intimacy and realism in these everyday moments.
Frame shots to include both the subject and their reflection in bathroom mirrors for layered storytelling compositions. Morning light creates a fresh, clean aesthetic that perfectly complements the natural beauty of skincare routines and personal care moments. Focus on hands applying products, facial expressions during cleansing, and the gentle interaction between subject and mirror.
Shoot from various heights and angles to capture different perspectives of the same routine actions. We recommend including environmental details like steam from hot water, product bottles, and bathroom fixtures to create comprehensive visual narratives. Time your shots to coincide with the strongest morning light for optimal exposure and natural warmth.
Sunset Glow Captures
Arrange shoots during sunset hours to capture orange, pink, and golden hues filtering through bathroom windows. These warm color palettes create dramatic backlighting effects and stunning silhouettes that add emotional depth to your images. Position subjects in bathtubs or near windows to maximize the glowing atmosphere that sunset provides.
Use frosted or clear windows strategically to control how sunset colors interact with your composition. Clear windows allow direct color casting while frosted surfaces diffuse the light for softer, more ethereal effects. We find that subjects positioned between the camera and sunset-lit windows create the most dramatic and visually striking silhouettes.
Experiment with different bathroom orientations to find windows that capture the best sunset angles for your location. West-facing bathrooms typically offer the strongest sunset illumination, while creative positioning can help you work with any available natural light source. Time your shoots carefully since sunset provides a narrow window of optimal lighting conditions that changes rapidly as the sun moves.
Couples Bathroom Photography: Intimate Moments Together

Couples bathroom photography transforms an ordinary private space into a canvas for capturing authentic connection and intimacy between partners. This photography style creates a relaxed environment where natural expressions and genuine emotions flourish.
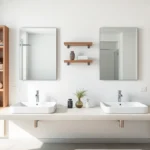
His and Hers Sink Shots
His and hers sink photography captures the beautiful symbolism of individuality within a shared space. Partners using separate sinks while grooming side by side creates compelling visual narratives that showcase both unity and personal routine.
Mirrored actions work exceptionally well for these compositions, with each partner brushing teeth, applying makeup, or completing their morning rituals simultaneously. We recommend focusing on juxtaposed routines that highlight the different ways partners approach their daily care.
Creative angles can transform mundane activities into romantic storytelling moments. Photographers often capture partners from behind, emphasizing the parallel nature of their routines while maintaining intimacy through proximity.
Lighting plays a crucial role in sink photography, with vanity lights providing even illumination across both partners’ faces. Natural morning light streaming through windows adds warmth and authenticity to these everyday moments.
Shared Mirror Reflections
Shared mirror reflections offer endless creative possibilities for couples bathroom photography. Mirrors naturally create depth and visual interest while capturing multiple perspectives within a single frame.
Positioning becomes key when working with mirror reflections, with one partner looking into the mirror while the other watches from behind creating layered storytelling. Both partners can face the mirror together, creating symmetrical compositions that emphasize their connection.
Depth of field techniques add artistic flair to mirror shots, allowing photographers to focus on reflections while softly blurring the actual subjects. This approach creates dreamy, ethereal images that feel both intimate and professional.
Lighting and reflections work together to add nuance and complexity to mirror photography. Soft lighting prevents harsh shadows while maintaining the natural glow that makes couples photography so appealing.
Playful Interaction Poses
Playful interaction poses bring unexpected joy and spontaneity to couples bathroom photography. Bathrooms become surprisingly fun spaces when partners engage in lighthearted activities together.
Sharing toothpaste, splashing water, or enjoying a mock bubble fight in the tub creates genuine laughter and connection. These unscripted moments often produce the most captivating and memorable images.
Props add personality and humor to playful bathroom shoots, with rubber ducks, shower caps, or matching towels and robes creating whimsical elements. Champagne glasses, rose petals, or plush towels can elevate the mood from playful to romantic.
Candid moments capture authentic emotions that posed shots often miss, encouraging couples to interact naturally while the photographer documents their genuine responses. Bubbly bathwater and soft candlelight create romantic atmospheres that enhance the overall aesthetic of playful interaction photography.
Creative Angles and Perspectives: Unique Bathroom Compositions

Transforming your bathroom photography goes beyond traditional poses by exploring ever-changing camera positions and artistic viewpoints. These innovative perspectives help us capture the full story of your space while creating visually striking compositions that stand out on social media.
Overhead Bathtub Views
Overhead shots reveal the complete bathtub scene from directly above, emphasizing both your position and the surrounding bathroom elements. Position your camera or phone directly over the bathtub using a tripod or stable surface to capture this bird’s eye perspective. We recommend including decorative elements like candles, flower petals, or towels arranged around the tub’s perimeter to create visual interest in the frame’s edges.
Document the entire bathing ritual by shooting from above during different stages of your routine. Start with an empty tub featuring carefully placed props, then progress to capturing the filling process with bubbles or milk bath elements. The overhead angle naturally flatters your subject while showcasing the bathroom’s tile patterns and architectural details that might otherwise go unnoticed.
Create depth in overhead compositions by varying the height of your camera position. Shooting from different elevations changes the perspective dramatically, allowing us to include more or fewer surrounding elements. Higher positions capture more of the bathroom’s context, while lower angles focus attention on the immediate bathtub area and your subject’s positioning.
Low Angle Floor Shots
Floor level photography creates dramatic effects by shooting upward at bathtub fixtures and bathroom elements. Place your camera on the bathroom floor and angle it toward your subject to achieve this powerful perspective. We find this technique particularly effective for capturing the grandeur of freestanding bathtubs or emphasizing the height of bathroom ceilings and architectural features.
Experiment with different floor positions to discover unique viewpoints throughout your bathroom space. Corner placements often provide interesting diagonal lines, while positioning near the bathroom entrance creates depth through leading lines. The low angle naturally adds drama and sophistication to even the simplest bathroom setups.
Incorporate bathroom accessories and fixtures as foreground elements in low angle compositions. Items like decorative bath mats, candles placed on the floor, or trailing plants create layered storytelling within the frame. This technique transforms ordinary bathroom elements into artistic components that enhance your overall composition.
Geometric Tile Patterns
Bathroom tile patterns serve as natural compositional guides for creating visually appealing geometric arrangements. We use existing tile lines to position our subjects and align props, letting the inherent patterns direct the viewer’s eye through the frame. Square tiles work particularly well for grid based compositions, while hexagonal or diagonal patterns add ever-changing movement to static shots.
Focus specifically on color relationships within your tile work to enhance photographic impact. Neutral tiles provide clean backgrounds that make colorful props pop, while patterned tiles add texture and visual interest to minimalist compositions. We often use contrasting bath accessories against monochromatic tile backgrounds to create striking focal points.
Frame your shots to emphasize repeating tile elements and their geometric relationships. Close up photography of tile patterns creates abstract compositions, while wider shots show how these patterns interact with your subject and bathroom fixtures. The key lies in balancing the geometric elements with organic shapes from your body positioning and prop placement.
Safety and Privacy Considerations: Professional Bathroom Photography Tips

Creating stunning bathroom photography requires balancing artistic vision with responsible practices. We’ll explore essential safety measures and privacy guidelines that ensure professional results while protecting everyone involved.
Maintaining Modesty Guidelines
Privacy screens become essential tools when working with clients who want tasteful bathroom photography. We recommend positioning moveable screens or curtains strategically to maintain comfort levels throughout the shoot. Towels and robes should remain easily accessible at all times, allowing subjects to adjust their coverage between shots.
Communication establishes clear boundaries before any photography session begins. We discuss exact poses and angles with our clients, ensuring they understand exactly what will be captured and how. Bathroom shoots require extra sensitivity since the intimate setting can make people feel vulnerable.
Strategic positioning protects privacy while still achieving beautiful compositions. We focus on angles that capture the essence of luxury bathroom experiences without compromising modesty. Shoulder-up shots, artistic silhouettes through frosted glass, and carefully framed reflections create stunning visuals while respecting personal boundaries.
Proper Equipment Protection
Moisture control prevents expensive equipment damage in humid bathroom environments. We use protective covers on cameras and lenses when working near steam sources or running water. Silica gel packets placed in camera bags absorb excess moisture during extended bathroom shoots.
Secure mounting systems prevent accidents on slippery bathroom surfaces. We attach sandbags to tripod legs and use gaffer tape to secure light stands and cables. This equipment protection becomes critical when working around wet floors and limited space.
Proper ventilation reduces condensation buildup that can fog lenses and damage electronics. We run exhaust fans or crack windows between shots to maintain optimal air circulation. Emergency preparedness includes keeping first aid kits accessible and knowing the location of all emergency exits.
Consent and Comfort Boundaries
Written agreements protect both photographers and subjects before bathroom photoshoots begin. We document exact poses, angles, and usage rights that everyone has agreed upon. This consent process becomes especially important when shooting in intimate spaces like bathrooms.
Regular check-ins maintain comfort levels throughout the photography session. We pause frequently to ask how subjects are feeling and whether they want to adjust any poses or angles. Bathroom environments can feel particularly vulnerable, so ongoing communication ensures everyone remains comfortable.
Flexible shooting schedules accommodate personal needs during longer bathroom photography sessions. We provide comfortable seating and refreshments between shots, allowing subjects to take breaks whenever needed. Temperature control and privacy options help maintain a professional yet comfortable atmosphere throughout the entire shoot.
Conclusion
We’ve explored the endless creative possibilities that your bathroom offers as a photography backdrop. From dramatic steam effects and golden hour lighting to intimate couples shots and architectural details each technique opens new doors for visual storytelling.
The key to stunning bathroom photography lies in experimenting with different angles lighting conditions and props while always prioritizing safety and comfort. Whether you’re capturing morning routines or creating artistic black and white compositions remember that authenticity resonates most with viewers.
Transform your daily space into a professional studio by applying these techniques consistently. With practice you’ll develop your unique style and create compelling content that stands out in today’s competitive social media industry.
Frequently Asked Questions
What makes bathroom photography different from regular portrait photography?
Bathroom photography utilizes unique elements like natural lighting from windows, reflective surfaces, steam effects, and intimate settings. Unlike traditional portraits, it focuses on creating atmospheric moods using mirrors, water droplets, and architectural details. The confined space requires creative angles and careful composition to transform everyday routines into artistic visual content.
How do I achieve the best lighting for bathroom photoshoots?
Natural light is ideal, especially during golden hour when soft, warm light streams through windows. Position yourself near windows for flattering illumination. For artificial lighting, use vanity lights or candles to create ambient atmosphere. Avoid harsh overhead lighting, and consider using steam or bubbles as natural light diffusers for softer effects.
What are the most popular bathroom photography poses?
Classic poses include full-body mirror selfies, close-up reflection portraits, and bathtub shots with bubbles or flower petals. Try experimenting with different angles and heights for mirror shots, capture silhouettes through steamy glass, and document beauty routines at vanity areas. Movement and natural postures add energy to static compositions.
How can I ensure privacy and safety during bathroom photoshoots?
Use privacy screens, maintain clear communication about boundaries, and ensure proper consent for all poses. Protect camera equipment from moisture with waterproof covers. Ensure adequate ventilation to prevent condensation buildup. Always prioritize comfort and establish clear boundaries before beginning any bathroom photography session.
What props work best for bathroom photography?
Essential props include fluffy white towels, luxurious robes, plants for natural framing, candles for ambient lighting, and flower petals for color. Use contrasting textures and colors to enhance visual interest. Beauty products, skincare items, and bath accessories can add authenticity to your shots while maintaining the clean, minimalist aesthetic.
How do I create artistic black and white bathroom photos?
Focus on contrast, texture, and architectural details in black and white photography. Emphasize the interplay of light and shadow, capture soft gray tones using diffused lighting, and highlight unique fixtures and patterns. This timeless style draws attention to form and composition rather than color, creating elegant and sophisticated images.
What camera settings work best for bathroom photography?
Use a wide aperture (f/2.8-f/4) for shallow depth of field and bokeh effects. Adjust ISO based on available light – keep it low (100-400) for natural light, higher (800-1600) for low-light conditions. Use faster shutter speeds to prevent camera shake in humid conditions, and shoot in RAW format for maximum editing flexibility.
How can couples create compelling bathroom photography together?
Capture “his and hers” sink shots showing individuality within shared spaces. Use shared mirror reflections for layered storytelling, and focus on playful interactions and spontaneous moments. Try mirrored actions, creative angles, and include props that reflect both personalities. Maintain good lighting and experiment with different compositions to showcase your connection.