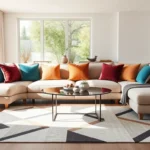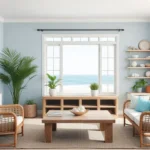
Small bathrooms don’t have to feel cramped or uninspiring. We’ve discovered that with the right DIY approach, even the tiniest powder room can transform into a functional and stylish space that maximizes every square inch.
Whether you’re dealing with a narrow half-bath or a compact full bathroom, we know the struggle of making limited space work harder. The good news? You don’t need a massive renovation budget or professional contractors to create dramatic improvements. Smart storage answers, clever design tricks, and strategic updates can completely change how your small bathroom looks and functions.
We’re about to share our favorite DIY small bathroom ideas that’ll help you unlock your space’s hidden potential. From budget-friendly storage hacks to space-expanding visual tricks, these practical answers will transform your cramped bathroom into an organized oasis you’ll actually want to spend time in.
Maximize Storage With Vertical Shelving Solutions
Vertical storage transforms wasted wall space into functional storage areas that keep your bathroom organized and clutter-free. We’ll show you three effective vertical shelving answers that maximize your small bathroom’s storage potential.
Install Floating Shelves Above the Toilet
Floating shelves above the toilet create instant storage without taking up floor space. Position these shelves at different heights to accommodate various items like extra toilet paper, decorative baskets, or small plants. We recommend installing 2-3 shelves with 12-16 inches between each level for optimal accessibility.
Mount the shelves using heavy-duty wall anchors since bathroom items can be surprisingly heavy when combined. Choose moisture-resistant materials like sealed wood or metal brackets to withstand humidity. Space the shelves far enough from the toilet tank to allow comfortable access while maintaining a clean appearance.
Style these shelves with both functional and decorative items to create visual interest. Mix storage baskets with small plants or candles to balance practicality with aesthetics. Keep frequently used items on lower shelves and reserve higher shelves for backup supplies or decorative elements.
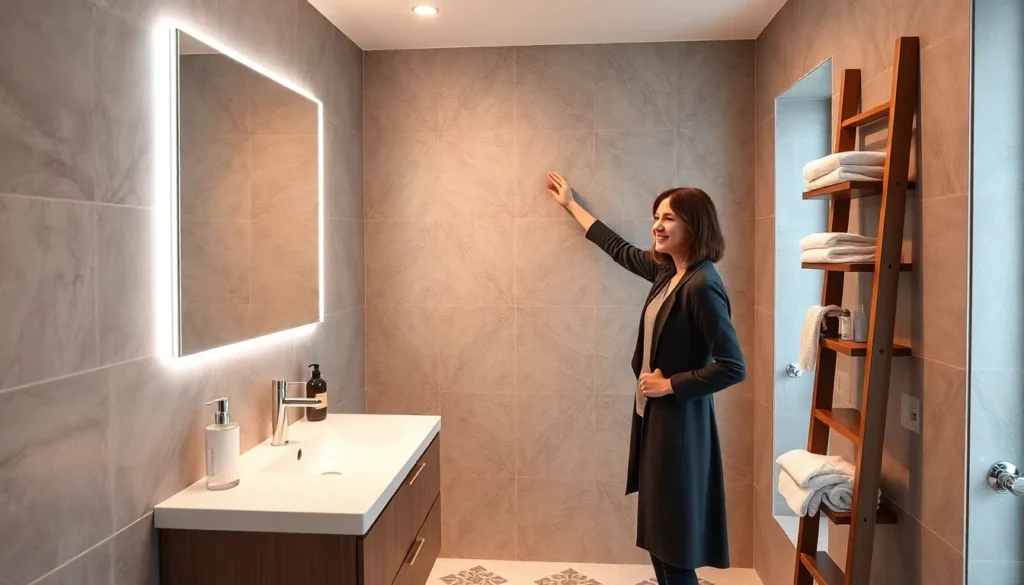
Create a Ladder Shelf for Towels and Decor
Ladder shelves provide multiple storage levels while adding rustic charm to your bathroom space. Build a simple ladder shelf using 2×4 lumber and wood screws, creating 4-5 rungs spaced 10-12 inches apart for towel storage. This design allows air circulation around towels while keeping them easily accessible.
Position the ladder shelf against a wall or in an unused corner where it won’t obstruct traffic flow. The angled design takes up minimal floor space while providing substantial storage capacity. Paint or stain the wood to match your bathroom’s color scheme and protect it from moisture damage.
Use different rungs for various purposes to maximize functionality. Hang towels on lower rungs for easy access, while upper rungs can hold decorative items or less frequently used linens. Add small baskets or containers to some rungs for storing smaller bathroom essentials like lotions or hair accessories.
Build Corner Shelving Units
Corner shelving units transform unused corner spaces into valuable storage areas that don’t interfere with your bathroom’s layout. These units fit snugly into corners, making them perfect for small bathrooms where every inch counts. Build triangular shelves that follow the corner’s natural lines for maximum space efficiency.
Create multiple shelf levels using progressively smaller triangular pieces to accommodate different item sizes. Install the bottom shelf higher than typical counter height to allow for cleaning underneath. Use adjustable shelf brackets so you can modify spacing as your storage needs change.
These corner units work exceptionally well for storing everyday items like shampoo bottles, soap dispensers, and toiletries. The triangular shape provides stable storage while the corner placement keeps items organized and easily accessible. Add LED strip lighting underneath each shelf to illuminate stored items and create ambient lighting in your bathroom.
Transform Your Space With Strategic Mirror Placement

Strategic mirror placement remains one of the most effective DIY answers for making small bathrooms appear significantly larger.
Install a Large Mirror to Create Visual Depth
Installing a large mirror creates the illusion of a larger space by reflecting light and images, so adding visual depth to your small bathroom. We recommend choosing a mirror that covers at least two-thirds of your wall space above the vanity for maximum impact. Position the mirror at eye level to ensure it captures the most light and reflects the most visual space back into the room.
Consider mounting your large mirror directly onto the wall rather than using a frame to maximize the reflective surface area. This approach eliminates visual barriers and creates a seamless look that enhances the spacious feeling. Select mirrors with beveled edges or simple frames to maintain a clean aesthetic that won’t overwhelm your small bathroom space.
Add Multiple Mirrors for Maximum Light Reflection
Adding multiple mirrors maximizes light reflection and further enhances the sense of space throughout your bathroom. We suggest placing smaller mirrors on adjacent walls to create a continuous flow of reflected light that bounces around the room. This technique works particularly well when you position mirrors to catch natural light from windows or artificial light from fixtures.
Consider installing three small round mirrors in a triangular arrangement or two rectangular mirrors on opposite walls for balanced light distribution. Multiple mirrors also serve functional purposes by providing different viewing angles for grooming tasks. Choose mirrors of varying sizes and shapes to add visual interest while maintaining the space-expanding benefits.
Create a Mirror Wall Feature
Creating a mirror wall feature transforms your small bathroom into a stunning focal point while dramatically expanding the perceived space. We recommend using mirror tiles or a collection of frameless mirrors to cover an entire accent wall for maximum visual impact. This approach creates depth and reflects light from multiple angles throughout the room.
Install your mirror wall on the wall opposite your bathroom entrance to immediately draw the eye and create the illusion of extended space. Use adhesive mirror squares for an easy DIY installation that doesn’t require professional mounting hardware. Consider adding LED strip lighting behind or around your mirror wall to enhance the reflective effect and create ambient lighting that makes your bathroom feel more luxurious.
Optimize Floor Space With Wall-Mounted Fixtures

Wall-mounted fixtures transform cramped bathroom layouts by lifting essential elements off the floor and creating an illusion of expanded space.
Install a Wall-Mounted Vanity
Wall-mounted vanities significantly reduce the footprint in your bathroom while creating more open floor space. These floating designs make cleaning underneath easier and allow natural light to flow more freely throughout the room.
Choose the right height: Mount your vanity 32 to 36 inches from the floor to ensure comfortable use for most adults. Secure mounting requires finding wall studs or using heavy-duty wall anchors rated for at least 100 pounds.
Consider storage needs: Select vanities with built-in drawers or open shelving to maintain functionality while maximizing floor visibility. Drawers work better than cabinets in small spaces since they provide full access to stored items without requiring extra clearance for door swings.
Mount Your Toilet Paper Holder and Towel Bars
Mounted accessories keep essential items within reach without cluttering valuable floor space. Strategic placement of these fixtures creates a clean, organized appearance that makes your bathroom feel larger.
Position toilet paper holders: Install them 8 to 12 inches in front of the toilet bowl and 26 inches above the floor for optimal accessibility. This placement prevents users from reaching awkwardly while maintaining a streamlined look.
Install towel bars strategically: Mount towel bars 48 inches above the floor and at least 24 inches away from the toilet to ensure proper drying space. Multiple shorter bars work better than one long bar in compact bathrooms since they provide more hanging options without overwhelming the space.
Choose a Wall-Hung Toilet for Extra Floor Space
Wall-hung toilets allow for more floor visibility and can make your bathroom feel considerably larger. This design choice creates an uninterrupted floor line that enhances the perception of space while simplifying cleaning routines.
Understand installation requirements: Wall-hung toilets require an in-wall carrier system that supports up to 880 pounds and houses all plumbing connections. Professional installation typically costs $300 to $500 more than standard toilets but delivers important space benefits.
Maximize the visual impact: Position wall-hung toilets 15 to 17 inches from the floor to create optimal legroom while maintaining a floating appearance. The exposed floor area underneath makes your bathroom appear up to 30% larger visually.
Create the Illusion of Height With Vertical Design Elements

Visual tricks can dramatically transform how spacious our small bathroom feels. Drawing the eye upward makes ceilings appear taller and rooms more expansive.
Install Floor-to-Ceiling Tile Patterns
Installing floor-to-ceiling tile patterns creates the most dramatic height illusion in small bathrooms. We recommend running subway tiles vertically from floor to ceiling to emphasize the room’s vertical dimension. Large format tiles work exceptionally well since they reduce grout lines and create a seamless upward flow.
Stacking tiles in a brick pattern or running them diagonally can add visual interest while maintaining the vertical emphasis. Dark grout lines on light tiles help define the pattern and guide the eye upward. When we install tiles that reach the ceiling, the bathroom instantly feels more spacious and modern.
Add Vertical Stripes With Paint or Wallpaper
Adding vertical stripes through paint or wallpaper effectively creates visual height in bathrooms with low ceilings. We suggest painting alternating stripes in two complementary colors to maximize this effect. Tone-on-tone stripes provide a subtle approach while high-contrast combinations make a bold statement.
Removable wallpaper with vertical patterns offers an easy DIY solution for renters or those wanting temporary changes. Narrow stripes work better than wide ones for creating height illusions. We recommend keeping stripes consistent in width and spacing them evenly for the most polished look.
Hang Curtains Close to the Ceiling
Hanging curtains or shower curtains close to the ceiling elongates the entire space dramatically. We mount curtain rods just inches below the ceiling line rather than directly above the window or shower area. This technique draws attention upward and makes walls appear taller.
Floor-length curtains enhance this effect by creating an unbroken vertical line from ceiling to floor. We choose lightweight fabrics that flow naturally and avoid heavy materials that can overwhelm small spaces. Installing curtains on tracks or tension rods makes this an accessible DIY project that delivers immediate visual impact.
Brighten Your Bathroom With DIY Lighting Upgrades

Strategic lighting upgrades can transform your small bathroom into a bright and spacious sanctuary without very costly. These DIY lighting answers complement our previous space maximizing techniques while adding both functionality and ambiance to your compact bathroom.
Install Under-Cabinet LED Strip Lighting
Under-cabinet LED strip lighting creates additional illumination while making your small bathroom feel more spacious. We recommend installing these versatile strips beneath bathroom cabinets or countertops to provide task lighting that’s both practical and visually appealing. LED strips commonly used in kitchens work exceptionally well in bathrooms too.
Position the strips along the underside of floating vanities or wall mounted cabinets to highlight the floor area below. This technique creates an illusion of floating fixtures while providing gentle ambient lighting. The continuous line of light helps unify your bathroom’s design elements and makes the space appear larger than its actual dimensions.
Battery powered LED strips offer the easiest installation option since they don’t require electrical wiring. Simply clean the mounting surface and press the adhesive backing into place for instant lighting transformation.
Create a Vanity Light Bar
Vanity light bars provide essential task lighting for grooming activities while serving as attractive focal points. We suggest designing your own using repurposed wood planks or metal strips as the mounting base. This DIY approach lets you customize the fixture to match your bathroom’s exact style and dimensions.
Mount small LED bulbs or strips along a wooden frame positioned above or around your bathroom mirror. Reclaimed barn wood creates a rustic aesthetic while painted metal tubing delivers an industrial look. The key lies in spacing the lights evenly to eliminate shadows across your face during daily routines.
Consider the height and width of your existing mirror when planning your light bar dimensions. Position the fixture approximately 6 to 8 inches above the mirror’s top edge for optimal illumination coverage.
Add Battery-Operated Accent Lights
Battery-operated accent lights offer unlimited placement flexibility since they don’t require electrical connections or outlets. We love using these portable fixtures to highlight architectural features like recessed niches or built in shelving units. They’re particularly effective for showcasing decorative items while adding layers of ambient lighting.
Place battery powered puck lights inside medicine cabinets or linen closets to improve visibility and functionality. These compact fixtures typically provide 6 to 12 hours of continuous illumination before requiring battery replacement. Motion activated versions automatically turn on when you open cabinet doors.
Wireless LED strips work perfectly along the edges of floating shelves or behind mirrors to create dramatic backlighting effects. The soft glow adds depth and visual interest while making your small bathroom feel more luxurious and spa like.
Make a Statement With Bold Paint and Color Choices

Color transforms small bathrooms more dramatically than any other single design element. Bold paint choices create character and personality while working within your budget constraints.
Paint an Accent Wall in a Dark Color
Dark accent walls add sophisticated depth to compact bathroom spaces. Navy, charcoal, or forest green create striking focal points that visually recede, making your bathroom appear larger than its actual dimensions. We recommend choosing the wall behind your vanity or opposite the entrance for maximum impact.
Paint one wall in a dramatic hue while keeping the remaining walls neutral. This technique creates ever-changing contrast without overwhelming the space. Deep blues work particularly well with white fixtures, while rich greens complement brass or gold hardware beautifully.
Apply primer specifically designed for bathroom use before painting your accent wall. Moisture resistance prevents peeling and ensures your bold color choice remains vibrant for years to come.
Use Light Colors to Open Up the Space
Light colors reflect more natural light and create an airy atmosphere in small bathrooms. Whites, creams, and light grays make compact spaces feel significantly larger and brighter. We’ve found that soft pastels add subtle personality without compromising the open feeling.
Cream tones warm up the space while maintaining the light-reflecting benefits of white. Light gray provides a modern backdrop that pairs beautifully with both warm and cool accent colors. Pale blue or mint green creates a spa-like atmosphere that feels fresh and calming.
Paint your ceiling the same light color as your walls to eliminate visual boundaries. This technique makes the room feel taller and more expansive, especially when combined with your previously installed vertical design elements.
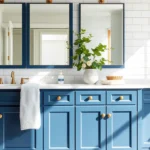
Add Color Through Painted Vanity Cabinets
Painted vanity cabinets serve as stunning focal points without overwhelming small bathroom spaces. Teal, mustard, or blush pink vanities create personality while keeping wall colors neutral. We recommend this approach when you want color impact without committing to painted walls.
Select colors that complement your existing fixtures and hardware. Warm tones like coral or sage green pair beautifully with brass fixtures, while cool blues and grays work well with chrome or brushed nickel. Bold colors like deep navy or emerald green create sophisticated contrast against white walls.
Clean and sand your existing vanity before applying primer designed for cabinetry. Use high-quality paint specifically formulated for bathroom environments to ensure durability. Apply thin, even coats and allow proper drying time between applications for professional-looking results.
| Method | Effect | Example Colors |
|---|---|---|
| Bold paint/color | Adds character, focal point | Deep blues, black |
| Accent wall (dark color) | Adds depth, visually recedes | Navy, charcoal, green |
| Light colors | Opens up space, maximizes light | White, cream, gray |
| Painted vanity cabinet | Adds personality, focal point | Teal, mustard, blush |
Maximize Counter Space With Creative Organization

Building on our space improving strategies, we’ll tackle one of the biggest challenges in small bathrooms: limited counter space. Smart organization transforms cluttered surfaces into functional areas that make your daily routine more efficient.
Build a Tiered Organizer for Toiletries
Tiered organizers create vertical storage that keeps your most used items within reach while clearing precious counter real estate. We recommend starting with floating shelves installed at different heights above your vanity to store bottles and jars in an organized, accessible manner. Wall mounted spice racks work exceptionally well as multi level organizers for bathroom essentials, giving you three or four tiers of storage in the space of one shelf.
Custom shelving answers allow you to design storage that fits your exact needs and bottle sizes. Consider repurposing cake stands or creating stepped platforms using wood blocks and small shelves to build your own tiered system. These DIY organizers reduce clutter significantly while making every toiletry easily accessible without digging through crowded drawers.
Install a Magnetic Strip for Small Metal Items
Magnetic strips offer surprisingly versatile storage for tiny metal items that typically create counter chaos. Mount a metal magnetic strip inside cabinet doors or directly on walls to hold bobby pins, tweezers, nail clippers, and small grooming tools in plain sight yet off your counter surfaces. This mounted tool storage keeps these frequently lost items exactly where you need them.
The beauty of magnetic storage lies in its discreet efficiency and instant accessibility. We’ve found that installing strips at eye level inside medicine cabinets or on the side of vanities creates the most convenient access points. Small metal containers can also stick to these strips, giving you additional storage for cotton swabs or safety pins while maintaining the clean, organized look you’re after.
Create Pull Out Drawers in Existing Cabinets
Pull out drawers transform deep, awkward cabinet spaces into fully accessible storage that maximizes every inch of your existing cabinetry. Add drawer dividers inside under sink cabinets to organize cleaning supplies, toiletries, and grooming tools in clearly defined sections that prevent items from getting lost in the back corners.
DIY drawer slides or rolling baskets create custom pull out systems that bring everything forward with a simple tug. Install these sliding mechanisms using basic hardware store supplies, focusing on the deepest cabinets where items typically disappear. Pull out trays work especially well for organizing bottles and containers, allowing you to see and access everything without removing items from the front to reach those behind.
Add Personality With DIY Decorative Elements

Once you’ve maximized your storage and lighting, it’s time to infuse character into your small bathroom with handcrafted touches that reflect your personal style.
Create Custom Artwork for Bathroom Walls
Mosaic art transforms plain walls into stunning focal points using small tiles or glass pieces arranged in eye-catching patterns. We recommend starting with a simple geometric design or nature-inspired motif that complements your bathroom’s color scheme. Creating these pieces requires basic adhesive, grout, and weatherproof materials that can withstand bathroom humidity.
Botanical prints bring soothing natural elements into confined spaces while adding visual interest above vanities or near bathtubs. Choose prints featuring flowers, leaves, or coastal themes that create a spa-like atmosphere. Framing these prints in moisture-resistant frames ensures they’ll maintain their beauty in humid conditions.
Wallpaper accent walls can add depth without overwhelming small spaces when you select subtle, elegant patterns. We suggest choosing designs with vertical elements that enhance the height illusion techniques we discussed earlier. Focus on one wall behind the toilet or vanity to create maximum impact without visual clutter.
Build a Rustic Wood Frame Mirror
Rustic wood frame mirrors serve as both functional fixtures and decorative statement pieces in small bathrooms. Using reclaimed wood creates an authentic weathered look while supporting sustainable decorating practices. We recommend measuring your existing mirror first, then cutting wood pieces to create a frame that extends at least 2 inches beyond each edge.
Sconces or battery-operated LED strips around your custom mirror enhance both ambiance and task lighting for grooming activities. Position these lights at eye level on either side of the mirror to eliminate shadows and create professional-quality illumination. This lighting combination works particularly well with the under-cabinet LED techniques we covered in our lighting section.
Staining or painting your wood frame allows you to match existing bathroom fixtures or create deliberate contrast for visual interest. Seal the wood with marine-grade polyurethane to protect against moisture damage and ensure your handcrafted mirror lasts for years.
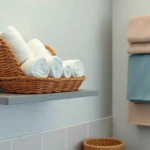
Make Your Own Decorative Storage Baskets
Wicker and wire baskets provide attractive storage answers that complement the rustic mirror aesthetic while maintaining organized spaces. We suggest selecting baskets in varying heights to create visual layers on open shelving or beside the vanity. These natural materials add texture and warmth to small bathrooms dominated by hard surfaces.
Thrifted items like vintage baskets or old containers can be repurposed with spray paint or rope wrapping to match your bathroom’s design theme. Look for unique shapes at estate sales or thrift stores, then customize them with waterproof finishes. This approach saves money while creating one-of-a-kind storage answers that guests will admire.
Maximizing vertical space with wall-mounted basket arrangements keeps essentials accessible while maintaining the clutter-free appearance we’ve established throughout our organization strategies. Mount baskets at different heights to store towels, toiletries, and cleaning supplies in designated areas that support your daily routine.
Upgrade Your Shower Area on a Budget

Transforming your shower space doesn’t require expensive renovations or professional contractors. We can achieve dramatic improvements with targeted DIY upgrades that cost under $100 in materials.
Install a Curved Shower Rod for Extra Space
Curved shower rods instantly expand your shower’s usable space by bowing outward from the shower wall. This simple modification adds precious elbow room inside the shower stall while making small bathrooms feel noticeably more spacious. Installation requires only basic tools like a drill and screwdriver, making it an ideal weekend project for beginners.
We recommend measuring your shower width carefully before purchasing to ensure proper fit. Most curved rods extend 6 to 8 inches beyond standard straight rods, creating important additional interior space. Home improvement stores carry various styles and finishes to match your existing bathroom hardware, with most options priced between $15 to $40.
Create Built-In Shower Niches
Built-in shower niches provide valuable storage for toiletries without encroaching on your limited shower space. We can create these recessed compartments by cutting into existing wall tiles or backer board, transforming dead wall space into functional storage areas. Pre-made niche inserts simplify the installation process for those with basic tiling skills.
Proper waterproofing becomes critical to prevent leaks and water damage behind your shower walls. We suggest applying waterproof membrane around the niche opening before installing tiles or inserts. Position niches at shoulder height for easy access to shampoo bottles and soap dispensers, keeping them within comfortable reach during daily routines.
Add a Shower Caddy System
Shower caddy systems organize essential items while keeping them easily accessible during your daily routine. Multi-tier caddies maximize vertical storage space without permanent installation requirements, making them perfect for renters or temporary answers. Over-the-door and suction-mounted options install quickly without tools or wall modifications.
We recommend selecting caddies made from rust-resistant materials like stainless steel or high-quality plastics designed for wet environments. Corner caddies use often-wasted space where shower walls meet, while hanging caddies suspend from showerheads or rods. These systems typically accommodate multiple bottles, razors, and washcloths while maintaining organized shower spaces that feel less cluttered and more functional.
Conclusion
Your small bathroom doesn’t have to feel cramped or compromise on style. With these practical DIY approaches we’ve shared you can create a space that’s both functional and beautiful without very costly.
The key is thinking creatively about every square inch. From vertical storage answers to strategic lighting upgrades each technique builds upon the others to maximize your bathroom’s potential.
Remember that small changes often yield the biggest visual impact. Whether you’re installing floating shelves or painting an accent wall these weekend projects can transform your daily routine and add real value to your home.
Start with one or two ideas that excite you most then gradually carry out others as time and budget allow. Your newly optimized bathroom will prove that size truly doesn’t limit style or functionality.
Frequently Asked Questions
What are the most effective DIY storage solutions for small bathrooms?
The most effective DIY storage solutions include vertical storage options like floating shelves above the toilet, ladder shelves for towels, and corner shelving units. These solutions maximize wall space while keeping floors clear. Building tiered organizers for toiletries and installing magnetic strips for small metal items also help optimize counter space efficiently.
How can mirrors make a small bathroom look bigger?
Mirrors create the illusion of larger space by reflecting light and expanding visual boundaries. Install a large mirror covering at least two-thirds of the wall above your vanity, or add multiple mirrors on adjacent walls. For dramatic effect, create a mirror wall feature using mirror tiles with LED strip lighting for enhanced ambiance.
What wall-mounted fixtures work best in small bathrooms?
Wall-mounted vanities are ideal as they reduce floor footprint and create open space underneath. Wall-hung toilets enhance the perception of space by creating an uninterrupted floor line. Mount toilet paper holders and towel bars on walls to keep essentials accessible while maintaining a clean, organized appearance throughout the bathroom.
How can I create the illusion of height in my small bathroom?
Install floor-to-ceiling tile patterns with vertically running subway tiles to emphasize vertical dimensions. Add vertical stripes through paint or wallpaper, and hang curtains close to the ceiling with floor-length panels. These visual tricks draw the eye upward, making your bathroom feel taller and more spacious than its actual dimensions.
What lighting upgrades can improve a small bathroom’s appearance?
Install under-cabinet LED strip lighting to create illumination and spaciousness. Create custom vanity light bars for essential task lighting, and use battery-operated accent lights for flexible placement. These lighting solutions complement space-maximizing techniques, making small bathrooms feel brighter, more inviting, and visually larger while improving functionality.
How do paint colors affect the perception of space in small bathrooms?
Light colors like whites and creams reflect natural light and make spaces feel larger, while dark accent walls in navy or charcoal create depth and focal points. Painted vanity cabinets in vibrant colors like teal or blush pink add personality without overwhelming. Use moisture-resistant primer and bathroom-specific paint for durability.
What are budget-friendly shower upgrades for small bathrooms?
Install a curved shower rod to create extra space within the shower stall. Build waterproofed shower niches for toiletries, or use shower caddy systems for organization without permanent installation. These upgrades, typically costing under $100, maximize functionality and comfort while remaining ideal for renters who need removable solutions.
How can I add personality to my small bathroom without cluttering it?
Create custom artwork like mosaic pieces or botanical prints for wall spaces. Use wallpaper accent walls with subtle patterns to add depth. Build rustic wood frame mirrors and decorative storage baskets that serve dual purposes. These handcrafted touches reflect personal style while maintaining organization and a warm, inviting atmosphere.