Tired of staring at those outdated bathroom tiles every morning? We’ve all been there – stuck with boring beige squares or cracked ceramic that makes our bathroom feel more like a public restroom than a personal sanctuary. The good news? You don’t need to tear out everything and start from scratch to transform your space.
Painting bathroom tiles has become one of the most popular DIY answers for budget-conscious homeowners who want maximum impact without the renovation nightmare. With the right techniques and materials we’ll share, you can completely reinvent your bathroom’s look in just a weekend.
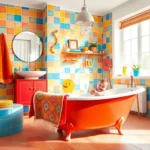
Whether you’re dreaming of sleek subway tiles, bold geometric patterns, or a fresh neutral palette that makes your space feel larger, we’ve gathered the most creative and practical tile painting ideas that actually work. Let’s jump into transforming your bathroom from drab to fab without very costly.
Choose the Right Paint for Your Bathroom Tile Project
Selecting the appropriate paint makes the difference between a successful tile transformation and a disappointing failure. We’ve tested various paint types to identify the best options for bathroom conditions.
Epoxy Paint for Maximum Durability
Epoxy paint delivers the strongest protection against moisture and daily wear in bathroom environments. This two-part paint system creates a hard, glass-like finish that resists chipping, scratching, and water damage better than any other option.
Key benefits include:
- Withstands temperatures up to 200°F without yellowing or cracking
- Provides 15-20 years of durability when properly applied
- Resists mold and mildew growth due to its non-porous surface
- Handles heavy scrubbing with abrasive cleaners
Application requires mixing the resin and hardener components before use, and you’ll need to complete the project within 4-6 hours once mixed. The paint takes 24-48 hours to fully cure, but the results justify the extra effort and drying time.
Acrylic Latex Paint for Easy Application
Acrylic latex paint offers the simplest painting process for beginners tackling their first tile project. This water-based formula cleans up easily with soap and water and produces minimal odors during application.
Advantages we’ve observed:
- Dries within 2-4 hours between coats
- Requires only basic brushes and rollers for application
- Costs 40-50% less than epoxy alternatives
- Provides 5-8 years of service life with proper preparation
Choose high-quality acrylic latex paint specifically formulated for bathroom use, as standard wall paints won’t withstand the humidity and temperature fluctuations. Apply a bonding primer first to ensure proper adhesion to glossy tile surfaces.
Chalk Paint for a Matte Finish
Chalk paint creates a sophisticated matte appearance that’s perfect for vintage or farmhouse bathroom styles. This paint adheres directly to most surfaces without extensive preparation work, making it ideal for textured or uneven tiles.
Notable characteristics include:
- Produces a soft, velvety texture that hides surface imperfections
- Allows for distressing techniques to create aged effects
- Requires sealing with wax or polyurethane for bathroom durability
- Offers unlimited color mixing possibilities for custom shades
The matte finish requires more maintenance than glossy alternatives, as it shows water spots and soap residue more easily. Plan to reapply protective sealers every 2-3 years to maintain the paint’s integrity in high-moisture areas.
Prepare Your Bathroom Tiles for Painting Success

Proper preparation makes the difference between a paint job that lasts for years and one that chips away within months. We’ll walk you through the essential steps that ensure your painted tiles maintain their fresh appearance.
Clean and Degrease All Surfaces
Start by thoroughly cleaning your tiles with a degreaser or trisodium phosphate (TSP) solution to eliminate soap scum, body oils, and accumulated grime. We recommend using TSP because it cuts through the stubborn residue that regular cleaners leave behind. Rinse all surfaces completely and allow them to dry entirely before moving to the next step.
Clean tiles provide the foundation for proper paint adhesion, so don’t rush this critical phase. Every trace of residue must be removed to prevent the paint from peeling or bubbling later. Focus extra attention on areas around the shower and tub where soap buildup is heaviest.
Sand or Etch for Better Adhesion
Lightly sand your tiles using an orbital sander equipped with 320-grit sandpaper to create the rough surface texture that paint needs to grip effectively. Both ceramic and porcelain tiles require this step because their naturally smooth finish prevents proper paint bonding. Work systematically across all tile surfaces, applying even pressure to avoid creating deep scratches.
Use a HEPA vacuum to remove all sanding dust from the tiles and surrounding areas. We follow up with a damp cloth to capture any remaining particles that could interfere with primer application. This meticulous dust removal ensures nothing compromises the bond between your tiles and the upcoming primer coat.
Prime with a High-Quality Bonding Primer
Apply a bonding primer specifically formulated for glossy or non-porous surfaces like bathroom tiles. Zinsser 123 performs exceptionally well on tile surfaces, though other high-adhesion primers designed for challenging surfaces also deliver reliable results. Cover every sanded area completely, paying special attention to grout lines and tile edges.
Allow the primer to cure according to manufacturer specifications, which sometimes requires up to a week for optimal bonding strength. We know waiting feels frustrating, but properly cured primer significantly improves your paint’s adhesion and overall durability. Maintain good ventilation throughout the priming process, especially when working with products that emit strong fumes.
Create Bold Color Blocking Patterns

Bold color blocking transforms your bathroom tiles into striking focal points using contrasting colors that create visually appealing geometric sections. We’ll explore three distinctive approaches that deliver modern sophistication while remaining achievable for DIY enthusiasts.
Geometric Designs with Painter’s Tape
Geometric patterns bring contemporary flair to your bathroom through precise shapes and clean lines. Apply painter’s tape in triangular, diamond, or hexagonal configurations across your prepared tiles. Paint between the tape sections using contrasting colors like navy blue against white or charcoal gray paired with soft cream. Remove the tape while paint remains slightly tacky to achieve crisp edges without peeling.
Complex geometric layouts work best when you sketch your design first on paper. Start with larger shapes before adding smaller accent elements. Two-tone geometric patterns create maximum visual impact without overwhelming smaller bathroom spaces.
Checkerboard Patterns for Classic Appeal
Checkerboard designs offer timeless elegance through alternating colored squares that suit various bathroom styles. Paint every other tile in your chosen accent color while leaving the remaining tiles in their base coat. Classic combinations include black and white, sage green and cream, or deep blue and pale gray.
Mark your starting point at the room’s center to ensure balanced placement. Tape off individual tiles before painting to maintain clean borders between colors. This pattern works exceptionally well in vintage-inspired bathrooms or spaces seeking traditional charm with modern durability.
Horizontal or Vertical Stripes
Striped patterns add ever-changing movement while creating optical illusions that can visually expand your bathroom space. Horizontal stripes make narrow bathrooms appear wider, while vertical stripes increase the perception of ceiling height. Use painter’s tape to create consistent stripe widths ranging from 2 to 6 inches depending on your tile size.
Choose three coordinating colors for sophisticated depth or stick with two high-contrast shades for bold impact. Apply the lightest color first as your base, then tape and paint progressively darker stripes. Metallic accent stripes in gold or silver add luxury touches to neutral color schemes.
Transform Your Space with Stenciled Designs

Stenciled patterns offer an accessible way to achieve professional-looking results without advanced artistic skills. We’ll explore three distinctive stenciling approaches that can completely transform your bathroom tiles.
Moroccan-Inspired Tile Patterns
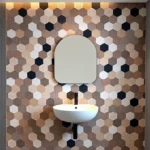
Moroccan stencil designs bring exotic sophistication to any bathroom through their intricate geometric shapes and vibrant color combinations. We recommend starting with traditional zellij-inspired patterns that feature interlocking geometric forms in rich jewel tones like deep blues, emerald greens, and warm terracottas.
Creating these patterns requires precision, so we suggest using high-quality stencils made from durable plastic or mylar materials. Position each stencil carefully to maintain consistent spacing between motifs, and use a stippling brush to prevent paint from bleeding under the edges.
Vibrant accent colors work best for highlighting the geometric elements within each pattern. We’ve found that metallic gold or copper paint adds an authentic touch when applied sparingly to border details or central focal points.
Floral and Botanical Motifs
Nature-inspired stencil designs create a serene atmosphere that transforms your bathroom into a peaceful retreat. We recommend delicate vine patterns, oversized tropical leaves, or cherry blossom branches for maximum visual impact.
Soft pastel colors like sage green, dusty rose, and lavender blue work beautifully for subtle botanical designs that won’t overwhelm the space. Bold jewel tones create dramatic statement walls when you want your floral motifs to serve as the room’s focal point.
Layering different stencil sizes adds depth and visual interest to your botanical theme. We suggest starting with larger leaf or flower shapes as your base layer, then adding smaller detail elements like stems or tiny buds for realistic dimension.
Modern Abstract Shapes
Contemporary abstract stencils offer endless possibilities for creating unique geometric combinations that reflect your personal style. We recommend bold triangular forms, overlapping circles, or asymmetrical polygon shapes for modern sophistication.
Geometric shape combinations work best when you limit your color palette to two or three complementary hues. We’ve achieved striking results using high-contrast pairings like navy blue with crisp white, or warm coral with deep charcoal gray.
Bold color applications create the most dramatic impact with abstract stenciling. We suggest using paint rollers or foam brushes for smooth, even coverage across larger geometric forms, then switching to artist brushes for precise detail work around stencil edges.
Add Texture with Special Painting Techniques

Transform your bathroom tiles beyond flat color by incorporating texture techniques that create depth and visual interest. These methods work beautifully over our previously discussed color blocking and stenciled designs.
Sponge Painting for Organic Patterns
Sponge painting creates organic, textured patterns that bring natural movement to your bathroom tiles. We recommend using a natural sea sponge rather than a synthetic one for the most authentic texture results. Dip the sponge lightly into your chosen paint color and dab it onto the tile surface in irregular patterns.
Start with a base coat of your primary color and allow it to dry completely. Apply the sponge technique using a complementary shade that’s either lighter or darker than your base. This layering approach creates dimensional patterns that mimic natural stone or add subtle variation to solid colored tiles.
Work in small sections to maintain consistent moisture levels in your paint. Rotate the sponge frequently and vary the pressure to avoid repetitive patterns that can look artificial.
Rag Rolling for Subtle Texture
Rag rolling involves using a cloth rag to create subtle, mottled textures across your tile surfaces. We suggest using lint free cotton rags or chamois cloths for the best texture results. This technique produces a soft, sophisticated finish that works particularly well in bathrooms seeking an elegant, understated look.
Apply your base coat and let it cure properly before beginning the rag rolling process. While the second coat is still wet, roll a bunched up rag across the surface in overlapping motions. The rag removes some of the wet paint while leaving behind a beautiful textured pattern.
Change your rag position frequently to prevent uniform patterns from developing. This technique requires working quickly since you need the paint to remain workable during the rolling process.
Dry Brushing for Weathered Effects
Dry brushing creates weathered, distressed appearances that add rustic charm to bathroom tiles. We achieve this effect by using a brush with very little paint, dragging it across the tile surface to highlight raised areas and create aged looking finishes.
Load your brush with paint, then remove most of it by brushing onto paper towels or cardboard until only traces remain. Lightly drag the nearly dry brush across your tiles in long, consistent strokes. This technique works exceptionally well for creating farmhouse or coastal bathroom aesthetics.
Focus on edges and raised areas of textured tiles where natural wear would typically occur. Build up the effect gradually with multiple light passes rather than trying to achieve the desired look in one application.
Mimic Expensive Materials with Faux Finishes

Transform your bathroom tiles into stunning surfaces that rival expensive materials with strategic faux painting techniques. These methods deliver luxury aesthetics at a fraction of replacement costs.
Marble Veining Techniques
Creating realistic marble veining requires layering paint and using specialized tools for authentic patterns. We start with a base coat in light gray or white, then apply darker paint using feathering tools to create natural looking veins.
Essential techniques for marble effects:
- Apply base colors using quality brushes for smooth coverage
- Drag feathering tools through wet paint to create organic vein patterns
- Blend multiple gray tones for depth and dimension
- Seal with waterproof topcoat for moisture protection
YouTube tutorials provide step-by-step demonstrations for achieving professional results. The process involves working in small sections while paint remains wet, allowing for seamless blending and realistic texture development.
Wood Grain Effects
Wood grain finishes use specialized brushes and glazes to create convincing timber textures on ceramic surfaces. We apply a base color first, then drag graining tools through wet paint or glaze to simulate natural wood patterns.
Key methods for wood grain replication:
- Choose graining brushes designed for texture creation
- Apply base colors matching desired wood tones
- Use stencils for uniform pattern consistency
- Protect with clear waterproof sealer for bathroom durability
Stenciling offers another approach for achieving consistent wood grain patterns across larger tile areas. This method works particularly well for creating uniform plank appearances on bathroom walls.
Stone and Granite Appearances
Stone and granite effects use sponging and rag-rolling techniques with multiple paint layers. We build depth by applying different shades using textured tools, creating natural stone patterns that mimic expensive materials.
Effective stone replication methods:
- Layer multiple paint colors for realistic depth
- Use natural sponges for organic texture patterns
- Apply textured plaster products like crackle paste for authenticity
- Seal thoroughly with isolation coats for moisture resistance
Products such as One Step Paint and antiquing glaze enhance the natural stone appearance while providing necessary durability. These finishes work effectively on both bathroom walls and floors when properly sealed against moisture infiltration.
Incorporate Trendy Color Schemes

Current color trends offer exciting opportunities to modernize your bathroom tiles with paint. We’ll explore three sophisticated approaches that create stunning visual impact while maintaining timeless appeal.
Monochromatic Gray Palettes
Gray palettes create sophisticated cohesion throughout your bathroom space. This single color theme approach involves painting all tiles in various shades of gray, from light dove gray to deep charcoal. Studies show this monochromatic style makes bathrooms feel larger and more open by eliminating visual breaks that fragment the space.
Different shades of gray add depth without compromising the unified look. We recommend using lighter grays on upper walls and darker tones on lower sections to create visual weight at the base. Paint your shower tiles in medium gray while keeping vanity backsplashes in soft pearl gray for subtle variation.
Create visual interest by incorporating three distinct gray tones throughout the room. Light gray works beautifully for ceiling areas, medium gray suits wall tiles perfectly, and dark gray provides excellent grounding for floor applications. This graduated approach maintains the monochromatic theme while adding dimensional appeal.
Bold Navy and White Combinations
Navy and white combinations deliver timeless nautical elegance to any bathroom. This classic pairing creates striking contrast that works exceptionally well in both traditional and contemporary settings. Paint your shower area tiles in bold navy while keeping surrounding wall tiles crisp white for maximum visual impact.
Contrasting accents enhance the sophisticated appeal of this color scheme. We suggest painting floor tiles in navy and wall tiles in white, or vice versa, depending on your room’s proportions. Vanity backsplashes painted in navy create stunning focal points against white cabinetry.
Strategic color placement maximizes the scheme’s effectiveness. Paint larger tile surfaces in navy to create anchor points throughout the room. White tiles work perfectly for smaller accent areas like shower niches, window surrounds, and decorative borders. This approach prevents the navy from overwhelming smaller spaces while maintaining the scheme’s bold character.
Warm Earth Tones
Earth tones bring natural warmth and organic beauty to bathroom spaces. Paint tiles in rich terracotta, warm sienna, or golden brown to create cozy ambiance that feels connected to nature. These colors work particularly well in bathrooms with natural light, where they enhance the room’s inviting atmosphere.
Coordinating accessories amplify the earthy aesthetic throughout your space. Match painted tile colors with natural fiber towels, woven baskets, and wooden accessories to enhance the organic feel. Copper fixtures complement terracotta tiles beautifully, while brass hardware pairs perfectly with golden brown painted surfaces.
Layer different earth tones for sophisticated depth and visual richness. We recommend painting larger surfaces in warm taupe or mushroom gray, then adding accent tiles in deeper terracotta or burnt orange. This layered approach creates natural variation that mimics the subtle color shifts found in stone and clay materials.
Maintain Your Painted Bathroom Tiles

We’ve transformed our bathroom tiles with beautiful painted finishes, and now it’s time to ensure they stay stunning for years to come. Proper maintenance protects our investment and keeps our bathroom looking fresh and vibrant.
Proper Cleaning Techniques
Use mild soap and water for routine cleaning to preserve the painted surface without causing damage. Gentle dish soap mixed with warm water creates an effective cleaning solution that won’t compromise the paint’s integrity.
Avoid abrasive cleaners or scrubbers that can scratch or wear away the painted finish. Steel wool, scouring pads, and harsh chemicals like bleach can deteriorate the paint coating and expose the underlying tile.
Apply cleaning solution with a soft microfiber cloth to gently remove dirt and grime without scratching. Microfiber naturally lifts debris while protecting the painted surface from damage.
Rinse thoroughly with clean water after cleaning to remove any soap residue that could build up over time. Leftover cleaning products can create a film that attracts more dirt and dulls the paint’s appearance.
Dry surfaces immediately with a clean towel to prevent water spots and minimize moisture exposure. Quick drying reduces the risk of water penetration that could compromise the paint’s adhesion.
Touch-Up and Repair Tips
Use the same paint color for touch-ups to maintain consistency across all painted tiles. Keep leftover paint properly sealed and stored for future maintenance needs.
Fix any chips promptly to prevent water damage from penetrating behind the painted surface. Small chips can quickly become major problems if moisture seeps underneath the paint layer.
Clean the damaged area thoroughly before applying touch-up paint to ensure proper adhesion. Remove any loose paint flakes and dirt from the chip or scratch before repair.
Apply thin coats of touch-up paint rather than one thick application for better coverage and durability. Multiple thin layers create a smoother finish that blends seamlessly with the existing paint.
Allow each touch-up coat to dry completely before applying additional layers or exposing the area to moisture. Rushing the drying process can result in poor adhesion and premature failure.
Long-Term Care Strategies
Regularly inspect for signs of wear or peeling to catch potential problems before they become major issues. Monthly visual inspections help identify areas that need attention early.
Avoid using harsh chemicals or high-pressure washes that can damage the paint coating over time. Steam cleaners and pressure washers can force moisture behind the paint and cause delamination.
Maintain proper bathroom ventilation to reduce moisture levels that can weaken paint adhesion. Run exhaust fans during and after showers to minimize humidity exposure.
Reapply protective topcoat every 2-3 years depending on usage and wear patterns. High-traffic areas may need more frequent topcoat renewal to maintain optimal protection.
Document your paint specifications and application dates for future reference when repairs or refreshing becomes necessary. Keep records of paint brands, colors, and primer types used for consistent results.
Conclusion
We’ve shown you that transforming your bathroom tiles doesn’t require expensive renovations or professional contractors. With the right paint selection proper preparation techniques and creative design approaches you can achieve stunning results that rival costly makeovers.
The key to success lies in combining quality materials with patience and attention to detail. Whether you choose bold geometric patterns sophisticated faux finishes or trendy color schemes your painted tiles will become a focal point that reflects your personal style.
Remember that maintenance plays a crucial role in preserving your investment. By following our care guidelines and performing regular touch-ups you’ll enjoy your beautifully transformed bathroom for years to come while saving thousands compared to traditional tile replacement.
Frequently Asked Questions
What types of paint work best for bathroom tiles?
The three main paint types for bathroom tiles are epoxy paint (most durable and moisture-resistant), acrylic latex paint (beginner-friendly and cost-effective), and chalk paint (provides sophisticated matte finish). Epoxy paint offers maximum longevity in humid bathroom conditions, while acrylic latex is easier to apply for DIY beginners. Choose based on your skill level, budget, and desired finish.
How do I properly prepare tiles before painting?
Proper preparation involves three essential steps: First, thoroughly clean and degrease tiles using TSP solution or degreaser to remove soap scum. Next, lightly sand the surface to create better paint adhesion and vacuum away dust. Finally, apply a high-quality bonding primer like Zinsser 123 designed for glossy surfaces and allow proper curing time.
Can I create patterns on painted tiles without professional skills?
Yes, you can achieve professional-looking patterns using simple techniques. Color blocking with painter’s tape creates geometric designs and stripes. Stencils allow you to add Moroccan patterns, floral motifs, or abstract shapes easily. Special techniques like sponge painting, rag rolling, and dry brushing add texture without requiring advanced artistic abilities.
How can I make my bathroom tiles look like expensive materials?
Faux painting techniques can mimic marble, wood, and stone at a fraction of the cost. Create marble effects using layering and veining tools, wood grain with specialized brushes and glazes, or stone textures through sponging and rag-rolling. YouTube tutorials provide visual guidance, and proper sealing ensures durability in bathroom conditions.
What are the best color schemes for painted bathroom tiles?
Three trending approaches work well: monochromatic gray palettes create spacious, cohesive looks; bold navy and white combinations offer timeless nautical elegance; and warm earth tones bring natural warmth. Choose colors that complement your existing fixtures and accessories while considering the size and lighting of your bathroom space.
How do I maintain painted bathroom tiles long-term?
Clean regularly with mild soap and water using soft microfiber cloths, avoiding abrasive cleaners. Address chips promptly with matching paint for touch-ups. Maintain proper ventilation, inspect for wear regularly, and reapply protective topcoats every few years. Document your paint specifications for future reference and consistency in maintenance efforts.