Designing the perfect bathroom starts with getting the floor plan right. Whether you’re renovating an existing space or building from scratch we know how challenging it can be to maximize every square foot while creating a functional and beautiful retreat.
We’ve seen countless homeowners struggle with awkward layouts that waste precious space and create daily frustrations. The good news? With the right floor plan approach you can transform even the smallest bathroom into an efficient oasis that meets all your needs.
From compact powder rooms to luxurious master suites we’ll explore proven layout strategies that professional designers use to optimize flow traffic patterns and storage. You’ll discover how smart planning can make your bathroom feel twice as large while incorporating all the features you’ve been dreaming of.
Small Bathroom Floor Plan Ideas That Maximize Every Square Foot
Working with limited square footage doesn’t mean sacrificing functionality or style. We’ve identified proven layout strategies that professional designers use to transform cramped bathrooms into efficient, comfortable spaces.
Corner Sink Layouts for Tight Spaces
Corner sink installations transform awkward angles into functional washing stations while preserving precious floor space. We recommend positioning these compact fixtures at 45-degree angles to create natural traffic flow patterns around the bathroom perimeter.
Triangular corner vanities work exceptionally well in bathrooms measuring 5×6 feet or smaller. These custom answers typically save 18-24 inches of wall space compared to traditional straight vanity configurations.
Floating corner sinks create visual lightness while providing essential storage underneath. We suggest pairing these fixtures with corner mirrors to reflect light and create the illusion of expanded space.
Angled plumbing runs behind corner installations require careful planning during the design phase. Professional installers typically need access through adjacent rooms or crawl spaces to accommodate the specialized drain and supply line configurations.
Wall-Mounted Fixture Arrangements
Wall mounted toilets eliminate the floor footprint around the base while creating continuous flooring lines that make rooms appear larger. These fixtures typically free up 6-8 inches of visual floor space compared to standard floor mounted models.
Floating vanities mounted 6-8 inches above the floor provide storage while maintaining clean sight lines underneath. We’ve seen these installations make 40-square-foot bathrooms feel 20% more spacious through improved visual flow.
Wall hung sinks work particularly well in powder rooms where storage needs are minimal. These streamlined fixtures require only 12-15 inches of projection from the wall compared to 20-24 inches for traditional vanity configurations.
Recessed medicine cabinets built into wall cavities provide essential storage without protruding into the room. Standard installations use the 3.5-inch space between wall studs to house toiletries and medications.
Pocket Door Integration Answers
Pocket doors eliminate the 30-inch swing radius required by traditional hinged doors while maintaining full access to bathroom spaces. We calculate these installations recover approximately 9 square feet of usable floor area in typical 5×8 foot bathroom layouts.
Single pocket doors slide into wall cavities constructed with specialized framing systems. These installations work best on walls without electrical or plumbing systems that could interfere with the door mechanism.
Barn style sliding doors mounted on exterior tracks provide pocket door benefits without wall cavity modifications. We recommend these answers for bathrooms where wall thickness limitations prevent traditional pocket door installations.
Glass pocket doors maintain visual connections between adjacent spaces while providing privacy when needed. Frosted or textured glass options allow natural light transmission while obscuring bathroom activities from connected bedrooms or hallways.
Master Bathroom Floor Plan Ideas for Luxury and Functionality
 2")
We’ve covered maximizing smaller spaces, and now let’s explore how master bathrooms can become true luxury retreats through thoughtful floor planning. Master bathroom designs require careful consideration of multiple functional zones to create the ultimate private sanctuary.
His and Hers Vanity Configurations
Dual vanities transform your morning routines by providing dedicated personal space for each partner. We recommend positioning two separate vanities along opposite walls or creating an L-shaped configuration that maximizes counter space. Each vanity should include its own mirror, task lighting, and storage compartments to eliminate morning traffic jams.
Central islands or consoles add sophisticated storage between dual vanities. These features provide convenient placement for shared toiletries, towels, and decorative accessories. We often see luxury bathroom designs incorporating marble-topped islands with built-in drawers and open shelving below.
Adequate spacing between vanities ensures comfortable movement throughout the space. Professional designers recommend maintaining at least 30 inches of clearance between vanity edges and 36 inches for wheelchair accessibility. This spacing prevents collisions during busy morning preparations.
Separate Shower and Tub Zones
Walk-in showers anchor the luxury bathroom experience with spacious, barrier-free designs. We design these zones with large rainfall showerheads, multiple body sprays, and built-in benches for relaxation. Glass enclosures maintain visual openness while containing water spray effectively.
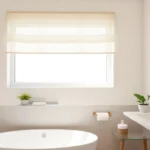
Freestanding tubs create dramatic focal points when positioned strategically near windows. Natural light streaming across a standalone soaking tub enhances the spa-like ambiance we’re creating. We recommend placing tubs perpendicular to windows to maximize both light exposure and privacy.
Separate zones prevent water crossover while maintaining design cohesion. Positioning the shower and tub on opposite sides of the bathroom allows each area to function independently. We use consistent materials like marble flooring and complementary fixtures to unify both zones visually.
Walk-In Closet Integration
Attached closets create seamless transitions between bathing and dressing areas. We position walk-in closets adjacent to master bathrooms with direct access doors that eliminate hallway traffic. This integration allows you to move effortlessly from shower to wardrobe selection.
Shared entrances from bedrooms enhance the luxury suite experience. Double doors or wide single entries connect bedrooms to both bathroom and closet spaces simultaneously. We design these entrances with pocket doors or barn-style sliding mechanisms to maximize floor space utilization.
Climate control considerations protect clothing while maintaining bathroom functionality. We install separate HVAC zones for closet areas to prevent humidity damage to garments and shoes. Proper ventilation systems ensure steam from showers doesn’t affect stored clothing items.
Accessible Bathroom Floor Plan Ideas for Universal Design
 4")
Universal design principles create bathroom spaces that welcome everyone, regardless of age or ability. These thoughtful layouts prioritize safety, independence, and comfort for all users.
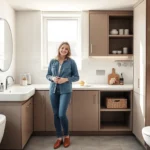
Wheelchair-Friendly Layout Options
Open plan configurations eliminate barriers and ensure fixtures remain reachable from seated positions. We recommend creating generous open spaces with minimum 5-foot turning radius areas for wheelchairs to maneuver comfortably.
Barrier-free showers feature roll-in designs with curbless entries at least 36 inches wide. Optimal dimensions of 36 inches wide by 60 inches deep accommodate caregiver assistance and provide adequate maneuvering space.
Recessed or wall-mounted sinks allow wheelchair users to approach closely for comfortable use. Clearance under sinks requires knee space measuring at least 27 inches high, 30 inches wide, and 11 to 25 inches deep.
Toilet placement with side or diagonal clearance enables easy transfers from wheelchairs. Accessible toilets feature seat heights between 17 and 19 inches, with clear floor space for transfers and grab bars positioned on at least one side.
Wider doorways ensure smooth entry and exit, with minimum 32-inch openings recommended and 36-inch doors preferred for optimal wheelchair access. Flat, curbless thresholds eliminate tripping hazards and rolling obstacles.
Grab Bar Placement Strategies
Toilet area grab bars provide essential support during transfers and sitting motions. Horizontal bars mounted on side walls and behind toilets offer multiple grip points for stability and confidence.
Shower and bath grab bars combine vertical and horizontal orientations for comprehensive support. Installation heights typically range from 33 to 36 inches above floor level, particularly at shower entries and along walls.
Wall-mounted grab bar systems use non-slip, durable materials like stainless steel for maximum safety. Secure installation into wall studs ensures bars can support user weight without failure.
Strategic placement locations include entry points, transfer areas, and standing positions throughout the bathroom. Multiple grab points create a network of support that enhances user confidence and independence.
Roll-In Shower Configurations
Curbless entry designs allow direct wheelchair access without barriers or steps. These seamless transitions eliminate the need for lifting or maneuvering over raised thresholds.
Spacious shower areas provide minimum dimensions of 36 inches wide and 60 inches deep for comfortable use. Larger configurations offer additional room for caregiver assistance and personal care activities.
Drop-in or fold-down seating increases comfort and flexibility for users who need seated showering options. These features accommodate various mobility levels and personal preferences.
Handheld showerheads offer convenience and control for users in seated positions. Adjustable mounting systems allow customization for different users and caregiving situations.
Slip-resistant flooring enhances safety throughout the shower area while maintaining proper drainage. Textured surfaces provide traction without creating cleaning difficulties or discomfort.
Half Bath Floor Plan Ideas for Guest Spaces
 6")
Creating a functional half bath for guests requires strategic planning that maximizes every square inch. We’ll explore smart design approaches that ensure your powder room feels welcoming while maintaining efficiency.
Powder Room Layout Essentials
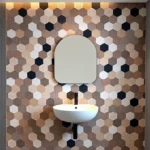
Compact layouts work best when we focus on single fixture arrangements that maintain visual space. We recommend pedestal sinks as the primary washing station since they create an open feel while providing essential functionality. Wall mounted fixtures help keep floors clear and contribute to the minimalist aesthetic that makes small spaces feel larger.
Strategic fixture positioning becomes crucial when working with limited square footage. We suggest placing the toilet and sink along the same wall to create an efficient traffic flow. Decorative mirrors expand the visual space while reflecting natural light throughout the room. Adequate lighting fixtures enhance both functionality and ambiance without overwhelming the compact design.
Visual continuity helps guest spaces feel more spacious than their actual measurements. We achieve this by selecting fixtures with similar finishes and maintaining consistent color schemes. Floor to ceiling elements like tall mirrors or vertical tile patterns draw the eye upward and create height illusions.
Space-Saving Fixture Placement
Shared plumbing walls reduce installation costs while maximizing available floor space for movement. We position both the toilet and sink along the same plumbing wall to streamline utility connections. This approach leaves the opposite wall free for storage or decorative elements that enhance the guest experience.
Compact fixture selection makes a important difference in tight quarters. We choose toilets with shorter projections and narrow profile sinks designed specifically for small bathrooms. Corner installations transform awkward angles into functional spaces while preserving central floor areas for comfortable navigation.
Wall mounted installations create the illusion of floating fixtures that make floors appear larger. We install wall hung toilets and floating vanities to maintain clear sight lines across the entire floor surface. This mounting approach also simplifies cleaning routines for busy homeowners.
Storage Answers for Small Spaces
Vertical storage systems maximize wall space without encroaching on movement areas. We install tall narrow cabinets that extend toward the ceiling to store guest essentials like extra towels and toiletries. Floating shelves positioned above the toilet provide accessible storage for decorative items and practical supplies.
Hidden storage compartments keep necessities organized while maintaining clean visual lines. We incorporate storage within vanity bases and behind decorative panels to conceal cleaning supplies and personal items. Recessed medicine cabinets built into wall cavities offer essential storage without protruding into the limited space.
Overhead storage answers use often overlooked areas above eye level. We add wall mounted cabinets or open shelving systems that don’t interfere with daily activities. Ledges positioned near sinks hold frequently used items like hand soap and small towels within easy reach of guests.
Open Concept Bathroom Floor Plan Ideas for Modern Homes
 8")
Open concept bathrooms redefine luxury by creating spacious retreats that connect seamlessly with adjacent living areas. These designs eliminate traditional barriers to promote natural light flow and establish resort-like atmospheres in your home.
Ensuite Bedroom Integration
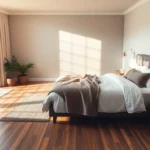
Ensuite bathrooms transform your bedroom into a private sanctuary by blurring the boundaries between sleeping and bathing spaces. We recommend using shared materials and matching color palettes to create visual continuity between rooms. Continuous flooring materials like wide-plank hardwood or large-format tiles enhance the unified aesthetic while making both spaces feel larger.
Built-in storage answers maximize both utility and beauty in integrated ensuites. Walk-in closets positioned between the bedroom and bathroom create natural transitions while providing essential organization. Storage cabinets built into shared walls eliminate clutter and maintain the clean lines essential for open concept success.
Direct access from the bedroom enhances convenience and privacy for couples sharing the space. We suggest positioning the entrance to avoid sightlines from the bed while maintaining easy accessibility. Dressing room areas within the ensuite provide additional privacy layers without compromising the open feel.
Glass Partition Designs
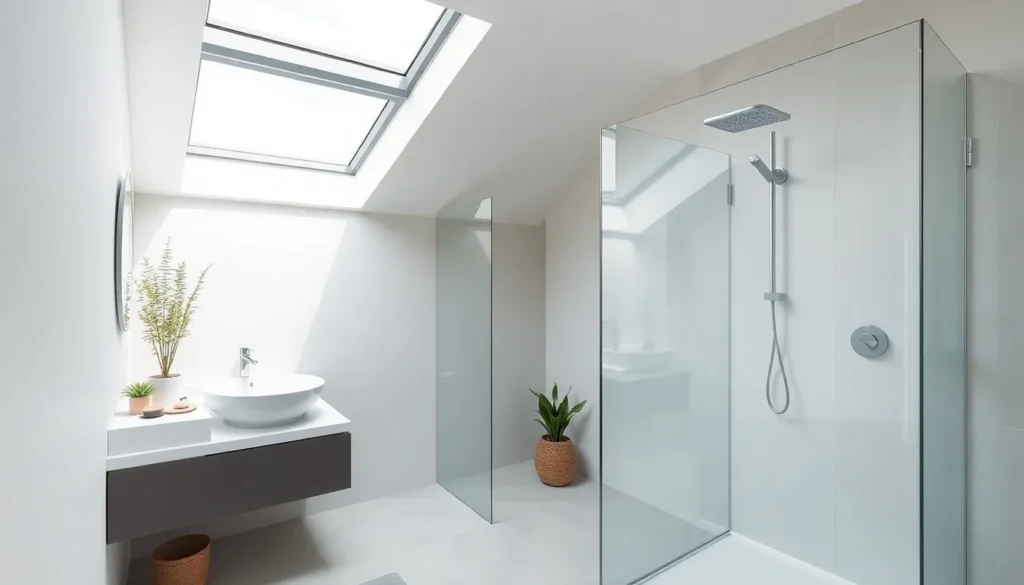
Glass partitions create visual openness while maintaining essential separation between wet and dry areas. Clear glass walls allow light to penetrate throughout the space, making even compact bathrooms feel dramatically larger. Frosted glass panels provide privacy for toilet areas while preserving the airy atmosphere that defines open concept design.
Sliding glass doors excel in narrow spaces by eliminating swing clearance requirements. We recommend floor-to-ceiling panels that maximize the visual impact and create seamless transitions between zones. Safety glass options ensure durability while complementing various design styles from modern minimalist to industrial chic.
Maintenance simplicity makes glass partitions practical for busy homeowners. Smooth surfaces resist soap buildup and clean easily with standard glass cleaners. Quality installation prevents water leakage while maintaining the sleek appearance that modern bathrooms demand.
Seamless Flow Considerations
Strategic fixture placement minimizes obstructions and ensures comfortable movement throughout the bathroom. We position vanities, toilets, showers, and tubs to create natural traffic patterns that feel intuitive rather than forced. Long linear arrangements work exceptionally well in narrow bathrooms, while L-shaped configurations maximize corner usage.
Unified flooring materials throughout the space create visual continuity essential for seamless flow. Large format tiles or continuous surfaces eliminate visual breaks that can make spaces feel choppy. We align fixture styles and finishes to maintain the cohesive aesthetic that makes open concept bathrooms successful.
Flexible positioning of key fixtures enhances both usability and comfort for daily routines. Toilets positioned away from main traffic areas provide privacy without interrupting flow patterns. Vanity placement near natural light sources improves functionality while contributing to the bright, airy atmosphere that defines modern open concept design.
Traditional Bathroom Floor Plan Ideas with Classic Appeal
 10")
Traditional bathroom floor plans embrace timeless design principles that have proven their worth across generations. We’ll explore how these layouts combine practical functionality with enduring elegance to create spaces that never go out of style.
Separate Wet and Dry Zones
Separating wet and dry areas forms the foundation of traditional bathroom design philosophy. We position showers or tubs in dedicated wet zones, typically against walls or in corners, while keeping sinks, toilets, and vanities in completely dry areas. This strategic separation improves functionality by preventing water damage to cabinetry and electrical fixtures while improving safety through reduced slip hazards.
Traditional layouts use this zoning approach to maintain the classic aesthetic that defines these timeless spaces. Water stays contained within designated bathing areas, protecting wooden vanities and fabric elements that characterize traditional design. The clear boundaries between zones also create natural traffic patterns that guide movement through the space efficiently.
Modern interpretations of this principle include glass enclosures or partial walls that maintain visual openness while preserving the wet/dry separation. We recommend placing tile or stone flooring in wet zones and extending hardwood or luxury vinyl into dry areas for both practical and aesthetic benefits.
Linen Closet Incorporation
Linen closets represent essential storage answers in traditional bathroom floor plans, keeping towels and toiletries organized within easy reach. We integrate built-in closets or storage cabinets directly into the room’s architecture, often recessing them into walls or incorporating them into vanity cabinetry for seamless appearance.
Traditional designs frequently position linen storage near the bathing area for convenient towel access while maintaining the room’s classic proportions. Built-in units preserve the clean lines that define traditional aesthetics while maximizing storage capacity without visual clutter. These integrated answers often feature adjustable shelving and dedicated compartments for different items.
Cabinet doors that match the vanity finish create cohesive design elements throughout the space. We suggest incorporating glass-front sections in upper cabinets to display decorative towels or apothecary jars while keeping everyday items hidden behind solid doors below.
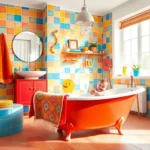
Vintage-Inspired Layouts
Vintage-inspired floor plans showcase classic elements like freestanding tubs, subway tile walls, and pedestal sinks that define traditional bathroom character. We arrange these fixtures symmetrically, often centering vanities between windows or positioning freestanding tubs as focal points to create balanced, harmonious compositions.
Symmetrical arrangements anchor the design while wood paneling, floral wallpaper, and brass or bronze fixtures add historical character to the space. Standard layouts include single-wall configurations with all fixtures along one wall, three-wall arrangements with fixtures positioned across from and perpendicular to each other, and open layouts that clearly separate bathing and grooming areas.
These vintage-inspired designs work effectively in both small and large bathrooms, ensuring efficient space utilization while preserving the inviting atmosphere that makes traditional bathrooms feel like personal retreats. Clawfoot tubs paired with pedestal sinks create authentic period charm, while subway tiles and hexagonal floor patterns reinforce the vintage aesthetic through time-tested materials and patterns.
L-Shaped Bathroom Floor Plan Ideas for Unique Spaces
 12")
L-shaped bathrooms present distinctive design opportunities that can transform awkward angles into highly functional spaces. We’ll explore strategic approaches to maximize these unique layouts while maintaining style and efficiency.
Corner Shower Placement
Maximize space efficiency by positioning showers in the natural corner created by L-shaped layouts. Corner installations minimize the fixture footprint while creating more open floor space for movement and additional features.
Design with accessibility in mind by incorporating built-in seating or strategically placed grab bars. These safety features enhance comfort without compromising the space-saving benefits of corner placement.
Use curved glass enclosures to soften angular transitions and create visual flow between the bathroom’s different zones. This approach helps the L-shaped layout feel more cohesive rather than choppy.
Consider neo-angle shower designs that cut across the corner at a 45-degree angle. These configurations often provide more interior shower space than traditional square corner units while maintaining the space-saving benefits.
Angled Vanity Arrangements
Create visual interest by installing vanities at angles that follow the room’s natural L-shape configuration. Angled vanities break up straight lines and add architectural appeal to otherwise standard bathroom layouts.
Enhance functionality through diagonal vanity placement that provides additional countertop space and easier access from multiple directions. This arrangement particularly benefits couples who need simultaneous access to grooming areas.
Incorporate corner storage answers beneath angled vanities to maximize every inch of available space. Custom cabinetry can transform dead corner areas into valuable storage for towels and toiletries.
Position mirrors strategically to reflect light around angled vanities and make the L-shaped space feel larger. Multiple mirrors at complementary angles can eliminate blind spots and improve the overall functionality.
Traffic Flow Optimization
Establish clear pathways between the different zones of your L-shaped bathroom to prevent congestion and improve safety. We recommend maintaining at least 30 inches of clearance between fixtures for comfortable movement.
Create designated activity zones within each arm of the L-shape to enhance functionality and organization. Separate grooming areas from bathing zones to allow multiple users without interference.
Design one-way circulation patterns that guide users naturally through the space without creating bottlenecks. This approach reduces congestion and makes the bathroom feel more spacious even though its angular layout.
Position the toilet strategically in the shorter arm of the L-shape to maintain privacy while keeping the longer section open for primary activities. This placement maximizes both functionality and visual appeal.
Jack and Jill Bathroom Floor Plan Ideas for Shared Spaces
 14")
Jack and Jill bathrooms serve as smart answers for families with multiple children or guests who need convenient access from adjacent bedrooms. These shared spaces require thoughtful planning to balance functionality with privacy while accommodating multiple users efficiently.
Dual Entry Configurations
Accessible doorways from both connecting rooms create the foundation of successful Jack and Jill bathroom designs. We recommend positioning entrances on opposite walls to minimize traffic congestion and allow simultaneous access without users crossing paths. This configuration works particularly well when the bathroom sits between two bedrooms of similar size.
Flexible layouts adapt to different space requirements depending on whether you’re designing for a master suite connection or children’s bedrooms. We’ve found that adjusting the bathroom’s orientation can accommodate varying room sizes while maintaining equal access from both sides. Strategic placement of fixtures ensures each entry point leads to logical activity zones.
Multiple user accommodation becomes seamless when you design pathways that don’t force users to navigate around each other. We suggest creating distinct circulation routes that connect each entrance to the primary fixtures without overlap. This approach reduces wait times and improves the overall user experience for busy households.
Privacy Answers
Divided activity zones provide essential privacy while allowing multiple people to use the bathroom simultaneously. We recommend separating the vanity area from the toilet and shower zones using partial walls or strategic fixture placement. This division lets one person use the sink while another accesses the toilet area privately.
Pocket doors between functional areas offer flexible privacy control without consuming valuable floor space that traditional swing doors require. We’ve observed that installing pocket doors between the toilet area and main bathroom creates an effective barrier while maintaining the room’s open feel. These doors slide completely into the wall cavity when not needed.
Visual barriers enhance comfort for users who share the space with siblings or guests. We suggest incorporating frosted glass panels or decorative screens that provide privacy without completely closing off areas. Strategic placement of these elements maintains the bathroom’s spacious feel while offering discretion when needed.
Shared Vanity Designs
Dual sink installations with individual faucets represent the most practical approach for Jack and Jill bathrooms serving multiple users. We recommend spacing sinks at least 30 inches apart to provide adequate elbow room and personal space for each user. This configuration reduces morning congestion and allows simultaneous use without interference.
Spanning mirrors across the entire vanity width create a cohesive look while providing ample reflection space for both users. We’ve found that single large mirrors work better than individual mirrors above each sink, as they make the space feel larger and more unified. LED lighting strips above or around the mirror ensure even illumination for both sink areas.
Ample storage answers keep personal items organized and prevent conflicts over space allocation. We suggest incorporating individual drawer sets or cabinet sections for each user, along with shared storage for common items like towels and cleaning supplies. Built in organizers within drawers help maintain order and make the most of available storage space.
Narrow Bathroom Floor Plan Ideas for Galley-Style Spaces
 16")
Galley-style bathrooms present unique challenges that require strategic planning to maximize functionality while maintaining visual appeal. We’ll explore proven layout strategies that transform these narrow spaces into efficient, comfortable retreats.
Linear Layout Strategies
Linear arrangements create the most efficient use of space in narrow bathrooms by placing fixtures along a single continuous line. We recommend positioning fixtures in common sequences like sink-toilet-shower or sink-toilet-bathtub arrangements to minimize wasted floor area and maintain clear pathways throughout the space.
Streamlined fixture positioning eliminates awkward gaps and creates natural traffic flow patterns. Single-line configurations work particularly well when you place all major elements along one wall, keeping the opposite side available for storage answers or decorative features.
Walk-in showers positioned at one end create a streamlined appearance while clearly separating bathing areas from other bathroom functions. This arrangement works especially well in longer galley spaces where you can dedicate the far end to showering activities.
Single-Wall Arrangements
Single-wall layouts maximize floor space by consolidating all major bathroom elements along one continuous wall surface. We suggest grouping your vanity, toilet, and shower enclosure on the same wall to keep the opposite wall completely free for additional storage or visual breathing room.
Concentrated plumbing placement reduces installation costs while creating more open floor areas for movement and accessibility. This approach works particularly well when you’re dealing with structural limitations or existing plumbing configurations that can’t be easily relocated.
Opposite wall utilization becomes available for built-in storage cabinets, towel storage, or decorative elements that enhance the overall design aesthetic. You can install floor-to-ceiling storage units or floating shelves without interfering with essential bathroom functions.
Length Maximization Techniques
Length maximization transforms narrow spaces into visually expanded environments through strategic design choices and lighting techniques. We recommend installing floor-to-ceiling mirrors along one wall to create the illusion of doubled space while reflecting natural or artificial light throughout the room.
Glass shower doors and partitions allow light to flow freely through the space, preventing the enclosed feeling that solid barriers create. Frameless glass enclosures work particularly well in narrow bathrooms because they maintain visual continuity from one end to the other.
Recessed shelving and floating vanities increase usable floor area while providing essential storage without creating visual clutter. These space-saving features maintain clean sight lines that make narrow bathrooms feel more spacious and organized.
Bright lighting strategies using natural light sources or LED fixtures further elongate narrow spaces by eliminating dark corners and shadows. We suggest combining overhead lighting with wall-mounted fixtures to create even illumination that enhances the perception of width and length.
Multi-Functional Bathroom Floor Plan Ideas with Laundry Integration
 18")
Creating dual-purpose spaces transforms your bathroom into an efficient hub that maximizes every square foot. We’ll explore strategic approaches to seamlessly blend bathroom and laundry functions without compromising either space’s effectiveness.
Washer and Dryer Placement
Large bathroom installations offer the most flexibility for laundry integration. We position side-by-side washers and dryers in spacious bathrooms to maintain easy access while controlling noise and humidity levels. These open configurations create clear circulation paths between bathroom and laundry functions.
Compact answers work best in smaller bathrooms where space is at a premium. We recommend stackable units arranged along a single wall to preserve floor space for essential bathroom fixtures. Closet installations provide another excellent option, hiding appliances behind sliding doors while maintaining full functionality.
Utility wall placement keeps laundry equipment organized and visually contained. We design dedicated utility walls that house both appliances and related storage, creating a clean appearance that doesn’t disrupt the bathroom’s aesthetic. This approach helps separate wet and dry areas effectively.
Utility Sink Incorporation
Strategic positioning places utility sinks near washers and dryers for maximum convenience in pre-treating laundry. We integrate these sinks beside laundry areas or along walls with existing vanities to support multiple functions including handwashing clothes and soaking items.
Multi-purpose design allows utility sinks to serve both bathroom and laundry needs. We position these fixtures to handle cleaning tools, personal care tasks, and laundry preparation without creating workflow conflicts. This dual functionality maximizes the return on your square footage investment.
Wall integration combines utility sinks with bathroom vanities for seamless flow. We design continuous countertops that accommodate both personal care items and laundry supplies, creating unified work surfaces that enhance daily routines.
Storage and Organization Answers
Vertical storage maximizes space efficiency in multi-functional layouts. We install built-in cabinets and shelving above appliances to store laundry supplies, linens, and personal care items without consuming floor space. These answers extend from floor to ceiling for maximum capacity.
Floating vanities provide additional storage opportunities beneath fixtures. We combine these with linen closets to create comprehensive organization systems that accommodate both bathroom essentials and laundry supplies. Under-sink storage further enhances capacity without visual clutter.
Space-saving features include pocket doors and sliding storage units that minimize interference with daily activities. We incorporate folding counters and pull-out drying racks near washers and dryers to enhance functionality. These elements maintain accessibility while keeping spaces organized and efficient.
Conclusion
We’ve explored a comprehensive range of bathroom floor plan ideas that can transform any space into a functional and beautiful retreat. From space-saving answers for small bathrooms to luxurious master suite designs each layout strategy we’ve discussed focuses on maximizing efficiency while maintaining style.
The key to successful bathroom design lies in understanding your exact needs and space constraints. Whether you’re working with a narrow galley layout a unique L-shaped configuration or planning an accessible universal design the principles remain consistent: prioritize flow optimize storage and create zones that serve multiple purposes.
Remember that great bathroom design isn’t just about fitting fixtures into available space—it’s about creating a harmonious environment that enhances your daily routine. By applying these proven floor plan strategies you’ll be well-equipped to design a bathroom that perfectly balances functionality comfort and aesthetic appeal for years to come.
Frequently Asked Questions
What are the most important factors to consider when planning a bathroom floor plan?
The most important factors include traffic flow, storage optimization, and fixture placement. Focus on creating clear pathways between fixtures, maximizing counter and storage space, and ensuring adequate clearance around each element. Consider the bathroom’s primary users and their specific needs, whether it’s accessibility requirements, multiple users, or space constraints.
How can I make a small bathroom feel larger with smart floor planning?
Use wall-mounted fixtures like floating vanities and wall-hung toilets to create floor space. Install corner sinks or triangular vanities to utilize awkward angles. Choose pocket doors instead of swing doors to save floor area. Add recessed medicine cabinets and use glass shower doors to maintain visual openness.
What’s the ideal layout for a master bathroom?
A master bathroom should feature dual vanities with adequate spacing, separate shower and tub zones, and integrated walk-in closet access. Consider a central island for additional storage, ensure a 5-foot turning radius for comfortable movement, and create distinct wet and dry zones for optimal functionality and luxury.
How do I design an accessible bathroom floor plan?
Follow universal design principles with wheelchair-friendly layouts featuring a minimum 5-foot turning radius. Install barrier-free showers with curbless entries, recessed sinks, and wider doorways (36 inches minimum). Include grab bars, roll-in shower configurations, and slip-resistant flooring for safety and independence.
What’s the best approach for a half bath or powder room layout?
Maximize space with compact fixtures like pedestal sinks and position the toilet and sink along the same wall for better traffic flow. Use vertical storage solutions, install decorative mirrors to expand visual space, and consider shared plumbing walls to optimize the layout in these typically small spaces.
How do open concept bathroom designs work in modern homes?
Open concept bathrooms integrate seamlessly with bedrooms using shared materials and color palettes. Use glass partitions to separate wet and dry areas while maintaining visual openness. Focus on unified flooring materials, strategic fixture placement, and built-in storage solutions to create spacious, flowing retreats.
What defines a traditional bathroom floor plan?
Traditional layouts separate wet and dry zones for safety and efficiency, often featuring dedicated shower or tub areas. They incorporate linen closets for organized storage and vintage-inspired elements like freestanding tubs and pedestal sinks while maintaining practical functionality and timeless elegance.
How do I optimize an L-shaped bathroom layout?
Place corner showers to maximize space efficiency and consider neo-angle designs for better flow. Use angled vanity arrangements to add architectural appeal and ensure clear traffic pathways. Built-in seating and curved glass enclosures can enhance both functionality and visual appeal in these unique layouts.
What’s the best way to design a Jack and Jill bathroom?
Create dual entry configurations with accessible doorways from both connecting rooms. Design divided activity zones for privacy and establish distinct circulation routes. Include shared vanity designs with dual sinks and ample storage to accommodate multiple users efficiently while minimizing traffic congestion.
How can I maximize a narrow galley-style bathroom?
Use linear layout strategies positioning fixtures along a single line for efficient traffic flow. Consider single-wall arrangements to consolidate major elements and maximize length with floor-to-ceiling mirrors and glass shower doors. This approach minimizes wasted space while creating the illusion of expanded dimensions.